; Supermarket Serenade: 2008

Saturday, December 20, 2008

Ginger-Chai Cheesecake with White Chocolate Cream

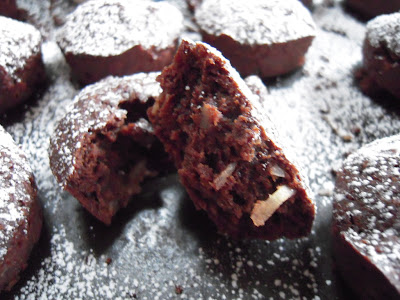
Chai is again an inspiration for a holiday treat that can be made ahead of time (I'm cooking enough on Christmas Eve so making dessert in advance is always something I love).


I have always been a tea drinker. When I was a small child I would sit excitedly with my cousin Lynn and wait for my grandmother Molly to pour my next cup in her fine Irish teacups. Already brewed in her Belleek teapot, she would pour the tea into each cup filling 1/4 of the way and we would fill the rest of the cup with milk and sugar. Over the years I've reduced the milk and sugar to none, but every so often if I'm craving a sweet cup of something I'll have a cup of chai tea with milk and sugar.

This cheesecake was inspired by my love of chai. While the Chai Latte Fudge I previously shared with you was made with a chai spice blend found in the spice aisle of the supermarket, this recipe actually uses chai teabags to infuse the batter with chai flavor.
Super tip:This recipe was a runner up in the Hood Holiday Recipe contest last year. The Hood contest is taking place this year as well, so if you have a favorite recipe that incorporates sour cream or heavy cream that you have created you should send it in...but hurry the contest ends January 16th!

I've topped the cheesecake with a white chocolate cream and the crust is made from crushed ginger cookies and crystallized ginger...it couldn't be easier and it's a delicious, impressive holiday dessert.
I have prepared just the cheesecake part for a luncheon on Tuesday and I'm going to wrap it and store it in the freezer until Monday. On Monday I will prepare the white chocolate cream, chill overnight and it will be ready to serve at my luncheon on Tuesday. This is how it looks so far:


I'll post the finished picture on Tuesday!

Ginger-Chai Cheesecake with White Chocolate Cream

CRUST:
2 cups finely ground ginger flavored cookies
1/4 cup finely diced crystallized ginger
1/4 cup (1/2 stick) butter, melted

FILLING:
6 chai teabags
1/2 cup boiling water
4 packages cream cheese, softened
1 1/4 cups sugar
1 cup Hood Sour Cream
4 eggs, room temperature

WHITE CHOCOLATE CREAM:
4 oz. good quality white chocolate
1 cup Hood Sour Cream

Preparation Time: 20 minutes
Total Cooking Time: 1 hour, 45 minutes
Chilling Time: at least 3-4 hours or overnight

Preheat oven to 325 degrees. Cover the outside of a 9-inch spring form pan with aluminum foil and place pan on a 9" x 16" or similar baking sheet.

To make the crust, in a medium-sized bowl, stir together the ground cookies, crystallized ginger and the melted butter. Press the mixture in the bottom and 1-inch up the sides of the spring form pan. Bake in the preheated oven for 10 minutes and let cool for 10 minutes.

To make the filling, steep the teabags in the 1/2 cup boiling water in a small bowl for 10 minutes. In a food processor or large mixing bowl, combine the cream cheese, sugar and 1 cup of Hood Sour Cream until well blended. Add the eggs one at a time, pulse or blend after each addition just until eggs are incorporated. Press the teabags against the side of the small bowl to completely drain; discard teabags.

Add the steeped tea to the cheesecake batter and process or blend just until combined. Pour the batter over the cooled crust. Place the cheesecake on the baking sheet on the center rack of the oven. On the bottom rack, place a 13" x 9" pan filled with hot water. Bake the cheesecake for 1 hour and 25 minutes or until the edges are lightly browned and center is set. Turn off the oven, open door slightly and let cake stay in the oven for 1 hour. Cool on wire rack. Run a sharp knife around the outside edges of the cheesecake, but do not release the sides.

To make the white chocolate cream, melt the white chocolate in a medium-sized bowl over a pot of simmering water, stirring until smooth. Fold the melted chocolate into the sour cream. Spread the white chocolate cream over the cheesecake. Chill the cheesecake in the pan for at least 3 hours until firm. Release the sides of the pan and transfer to a serving platter; cut into wedges to serve.

Friday, December 19, 2008

Favorite Food Finds Friday

All week long I have been baking and shopping, baking and shopping. (Did you notice I didn't say posting?) One day was even devoted to a group bake where a few friends and I got together and made multiple batches of three different cookies: Pecan Tassies, those "pretzel/kiss/mm things and a favorite of mine...The Barefoot Contessa's JamThumbprints. When I came home I was still in a baking mood so I baked my very favorite holiday cookie which I will share with you soon: Cherry Macaroon Puffs-they are very special cookies to me...

Baking with friends really made it less like work and more like an event. My friend Sue made everyone delicious paninis with her griddler and we enjoyed an afternoon of baking together and since it was at her house I didn't have a messy kitchen to clean up!! (Thanks, Susie!).

Ok I'll get to my favorite food find....it has to do with baking-sort of. I love to make fudge for gifts around the holidays and this year I used a favorite food find to create a tasty variation of the fudge recipe from the side of the Fluff tub. (Fluff isn't the Friday favorite but it does count as a favorite food find though...who doesn't love that sticky, sweet, velvety white treat??)

This week I love.....McCormick Gourmet Collection Chai Spice Blend! I replaced the semi-sweet chocolate chips with white chips and stirred in a teaspoon of the spice mixture to create what I am calling Chai Latte Fudge. Once the fudge is firm and you've cut it into squares, you can either serve it as is or for an extra pretty touch you can sift unsweetened cocoa powder over the squares. It's a melt in your mouth treat-perfect for teachers gifts or for your neighbors.

Chai Latte Fudge

5 cups sugar
1 1/4 cups evaporated milk
1/4 pound butter (1 stick), cut into tablespoons
1 (16 ounce) container Marshmallow Fluff
1 teaspoon salt
1 1/2 teaspoon vanilla extract
2 (12 ounce) packages white baking chips
1 teaspoon Chai Spice Blend
Line a 13x9 inch pan with aluminum foil leaving the edges of the foil hanging out of the pan. Lightly spray the foil with cooking spray.


Combine the sugar, evaporated milk, butter, Fluff, salt and salt in a large sauce pan. Stir over low heat until blended.

Bring mixture to a boil over medium heat, stirring. Being careful not to mistake escaping air bubbles for boiling. Then boil slowly, stirring constantly, for 5 minutes.


Remove from the heat. Stir in the vanilla, baking chips an the Chai Spice Blend. Pour into the prepared pan. Allow to cool at room temperature.

Yields: about 5 pounds of fudge

Store the fudge covered at room temperature. I don't like my fudge chilled...but hey, that's just me.

Wednesday, December 10, 2008

Snow-Capped Coconut Fudge Bites

Cookie number two!!

Next up is a rich chocolaty coconut treat! These bite-sized brownie like treats couldn't be any simpler to make and they are a favorite of mine-I love anything chocolate and coconut.

There are a few things you need to keep in mind during cookie week:

These are cookies, not diet food...so yes they're full of sugar and butter! (Everything in moderation, right?)
When you are storing your cookies, wrap each cookie separately otherwise they all start to taste the same.
If you are planning on freezing cookies that are coated with powdered sugar, plan on sprinkling a little extra after thawing.

Snow-Capped Coconut Fudge Bites
1 cup butter, softened
1 (11.5 ounce) package Bittersweet (not unsweetened) chocolate
1 cup sugar
1/3 cup heavy cream
1 teaspoon coconut extract (you may substitute vanilla extract)
3 large eggs
1 cup flour
1 cup shredded coconut
1/4 cup powdered sugar

Melt the butter and chocolate in a medium sized saucepan over medium heat, stirring frequently; cool completely.

Using a large spoon, stir in the sugar, heavy cream and coconut extract; stir until well combined. Add the eggs one at a time, stirring after each until incorporated. Gradually stir in the flour and the coconut.

Preheat oven to 350 degrees. Spray a mini muffin pan lightly with cooking spray. Spoon the batter into the cups filling each 2/3 full. Bake in the oven 14-16 minutes or until a toothpick inserted in the center comes out clean.

Gently remove bites from the pan and transfer to wire racks to cool completely.

Makes about 48 bites.

Note: Let the cakes cool for 5 minutes in the pan before gently removing bites and transferring to the wire rack to cool completely. Use a small spatula or knife to remove the bites being careful to not not break them. The "cookies" will be slightly crisp on the outside and tender on the inside.

Wednesday, November 26, 2008

Leftover Turkey!

OK, I know it's the day before Thanksgiving and you haven't even cooked the turkey yet, but it's not too early to plan for what to do with your turkey leftovers.

This month I have a recipe appearing in Cook's Country that won the grand prize for their leftover turkey recipe contest. I actually look forward to leftover turkey more than turkey on Thanksgiving Day because there are just so many delicious things you can make with the leftovers. This recipe combines pecans, blue cheese, cranberries and pears in a rustic tart.

Super tips: make this tart any time of the year using leftover roasted chicken or store bought rotisserie chicken. For an extra rich flavor substitute creme fraiche for the sour cream and heavy cream. Add a few dried cranberries and crushed pecans to the top just before baking for a splash of color on top.

Happy Thanksgiving!!

Rustic Turkey Tart

1 (9-inch) round prepared pie dough
1 1/2 cups leftover turkey meat, cut into bite-sized pieces
3/4 cup crumbled blue cheese
2 firm pears, peeled, cored and diced
1/4 cup pecans, toasted and chopped
1/4 cup dried cranberries
1 cup sour cream
3 tablespoons heavy cream
1 tablespoon minced fresh thyme
salt and pepper

1. Adjust oven rack to middle position and heat oven to 425 degrees. Gently press pie crust into 9 inch tart pan and trim excess dough with a knife. Prick bottom of dough all over with tines of fork. Bake until lightly browned, about 15 minutes; cool on wire rack.

2. Combine turkey, 1/2 cup cheese, pears, pecans, cranberries, sour cream, heavy cream and thyme in a large bowl; season with salt and pepper. Transfer turkey mixture to cooled pie crust, then sprinkle with remaining cheese.

3. Bake until crust is golden brown and cheese is melted, about 20 minutes. Let cool 20 minutes. Serve warm or at room temperature. (Tart can be refrigerated for 24 hours. Bring to room temperature before serving.


***************************************************************************


We have a winner!!! Some of you have a lot of my favorite appetizers as yours!!

Thank you to all those who participated in my 100th post giveaway....and the winner is....Andi!! That green bean appetizer that you wrote about sounds very interesting...I would love to try it-could you send me the recipe for that too?!!

Andi please email me at vcallag61@aol.com with your mailing address and I will get your package out right away!! Congratulations.

Wednesday, November 19, 2008

Thanksgiving Appetizers-Blue Cheese Cranberry Pear Toasts

Pssst...shhh...this is a secret.

I can't believe I am doing this, but I am about to share with you a top secret recipe. This is an appetizer recipe so secret that I have never shared it with another soul, until now.

Ok I'm being overly dramatic it's really not that unique, but let me tell you it's good...I hope you will agree. I love the blue cheese/pear/cranberry combination; it's great for a salad, it's great for a filling and it makes great appetizers. In this version the cheese is melted on toasts, but the spread is equally delicious served cold.

Super Tips:
Choose your blue cheese carefully. Pick one that you know you love and one that isn't too bitter-it's all about the cheese here.

Toast your bread ahead of time if you need to. Place toasts in a plastic bag until ready to use. Don't refrigerate the toasted bread or it will get soft.

For a low carb version, skip the bread completely and just serve the cheese spread cold on pear slices.
Serve the cheese spread on crackers or celery.

Walnuts make a fine substitution for the pecans or if you prefer leave the nuts out completely.

Blue Cheese Cranberry Pear Toasts

24-1/2 inch thick slices French bread
cooking spray
4 ounces cream cheese, room temperature
4 ounces blue cheese, room temperature
1/4 cup pecans (be generous)
1/4 cup dried cranberries
1/8 teaspoon cayenne pepper
1 Bosc pear, very thinly sliced

Preheat oven to 425 degrees.

Spray both sides of the bread slices with the cooking spray. Arrange bread slices on a large baking sheet and bake until lightly toasted, about 7 minutes.

In a small food processor combine the cream cheese, blue cheese, pecans, cranberries and cayenne pepper; process until just combined, but not smooth. Spread the cheese mixture onto one side of the toasts. Arrange a thin slice of pear on each toast.
Bake in the oven for 5-6 minutes or until lightly browned.
Yield: 24 toasts

Sweet!! Guess what's coming next??? My first giveaway!! Stay tuned!

Tuesday, November 18, 2008

Thanksgiving Appetizers-Rosemary Ham and Cheddar Spirals

Coming up with a Thanksgiving main course menu is pretty simple: Turkey, stuffing, potatoes, some vegetables and some pies for dessert. The hard part I think often lies in choosing some appetizers that are satisfying (while not being too heavy) and don't take too much time to prepare (you have enough to do that day!). So for the next few days I'll share with you some of my favorite simple Thanksgiving appetizers most of which can be prepared ahead of time.


First up is an old standby: puff pastry pinwheels. These pinwheels are made using Rosemary flavored ham (I used Boar's Head brand) and mild cheddar cheese. Try if you can to find the Rosemary Ham-the flavor is wonderful. But if you are unable to find it, just use your favorite ham and perhaps add some chopped fresh rosemary sprinkled over the ham and cheese.

To prepare the pinwheels ahead of time, roll the pastry around the ham and cheese, then wrap in plastic wrap; slice just before cooking.

While I like the simplicity of just the salt and pepper, some other ideas to coat the pastry would be poppy seeds, sesame seeds or fresh herbs.

If salt is an issue-replace the Rosemary Ham with low sodium ham and add chopped Rosemary in place of the salt.

Rosemary Ham and Cheddar Spirals

2 sheets of Pepperidge Farm puff pastry, thawed
2 teaspoons freshly ground pepper
1 teaspoon kosher salt
10 thin slices of Rosemary Ham
8 thin slices cheddar cheese (from the deli)

Preheat oven to 425 degrees. Line 2 baking sheets with parchment paper.

Roll pastry out on a lightly floured surface to smooth any seams from folding. Sprinkle the pepper and salt over the pastry and using a rolling pin, press the salt and pepper into one side of the pastry.

Arrange the ham and cheese in an even layer on the unsalted/peppered side of the pastry.
Roll the pastry around the filling. Using a sharp knife slice the roll into 1/2 inch thick slices.
Arrange the slices on the lined baking sheets.
Bake in the oven for 10-12 minutes or until the edges are lightly browned.

Yield: about 48 spirals

Friday, November 14, 2008

Favorite Food Finds Friday!

Today's favorite find is a special fruit that is plentiful in the produce aisle only from early November to early February....Clementines!

Clementines, usually found near the regular oranges and packed in small crates, are a small (usually seedless) easy to peel variety of mandarin oranges.

Because of their compact size, Clementines make the perfect lunchbox treat or snack. And while they are perfect to eat on their own, I decided to use them to in a "lemon bar" variation with great results. I adapted a recipe from Gourmet Magazine using the clementines instead of lemons.

Today is my day to cook for a local woman's shelter and I'm bringing these bars for dessert, I have to keep them chilled so I don't want to sprinkle the powdered sugar until the last minute...which is a tip: don't add the powdered sugar until shortly before you are planning on serving them. Now don't freak when you see that the recipe calls for 3 sticks of butter (OK you can freak a little)...you have to keep in mind that this recipe makes about 48 bars.
Super tips: look for crates of Clementines with colorful orangish-red fruit clear of blemishes. Store them at room temperature for up to a week or refrigerate them for up to about 2 weeks.
Darling Clementine Bars (adapted from Gourmet Magazine)

Crust:
4 cups all-purpose flour
1 cup granulated sugar
1/2 teaspoon salt
3 sticks of cold butter, cut into 1/2 inch pieces
For Filling:
6 large eggs
1 cup granulated sugar
1/4 cup all-purpose flour
1/4 cup heavy cream
1 tablespoon finely grated clementine zest
1/2 cup freshly squeezed clementine juice
1/4 teaspoon salt
Confectioner's sugar

Preheat oven to 350 degrees.

Pulse together the flour, sugar, and salt in a food processor just until combined. Add butter and pulse until the mixture resembles coarse crumbs. Press the dough into the bottom of an ungreased 13x9 inch baking pan. (I used the measuring cup to help press it down).
Bake until lightly browned, about 20 minutes.

For the filling whisk together the eggs, granulated sugar, flour heavy cream, zest, juice and salt in a bowl until well combined.

Remove the crust from the oven, whisk the filling again, then pour filling over the hot crust. Bake until the filling is just set, about 16 minutes. Transfer pan to a rack to cool.

Refrigerate bars, covered, until cold, at least 4 hours. Just before serving cut the bars into small squares then sift the confectioner's sugar in a thick layer over bars.

Yield: 48 bars

Thursday, November 13, 2008

Barefoot Thursday Herb Roasted Onions

Barefoot Thursday! Barefoot Thursday is the day when barefoot bloggers across the blogosphere whip up a recipe created by Ina Garten the Barefoot Contessa. Why don’t you find out more about it by visiting the Barefoot Bloggers…maybe you would even like to join in (I’ll bet you would like it).
This week's recipe was selected by Kelly from Baking with The Boys. The recipe was a simple, elegant roasted onion recipe. I only made a few minor alterations to the original recipe-I replaced the mustard with red pepper sauce (Tabasco) and added some fresh rosemary and dried thyme (I forgot to buy fresh Thyme). I served the onions with grilled sliced skirt steak and drizzled Worcestershire sauce over the steak and the onions just before serving. It was delicious!


Now a critical reader might say: "...eh, it looks like you burned the onions"

And to that I might quickly respond: "...yeah, well, I meant to do that-a crispy onion is a tasty onion thank you very much."

After finishing, I found myself wishing I had tossed the warm onions in a mixed field greens salad with a bit of goat cheese and some walnuts...I guess I'll have to make them again! The original recipe is here.

Lightly Spiced Herb Roasted Onions (adapted from Ina Garten's recipe)


2 red onions

1 yellow onion

2 tablespoons freshly squeezed lemon juice

1 teaspoon red pepper sauce (such as Tabasco)

1/2 tablespoon finely chopped fresh rosemary

pinch dried thyme

1 teaspoon minced garlic

3/4 teaspoon kosher salt

1/4 teaspoon freshly ground black pepper

1/4 cup good olive oil

Preheat oven to 400 degrees.

Remove the stem end of each onion and carefully slice off the brown part of the root end, leaving the root in tact. Peel the onions and slice into wedges. Place the wedges in a large ovenproof skillet.

Whisk together the lemon juice, Tabasco, rosemary, thyme, garlic, salt and pepper. Gradually add the oil, whisking to combine. Pour the dressing over the onions in the skillet and gently toss to coat. Place the onions in the oven and roast for 30-40 minutes. Stir the onions once during roasting.

Tuesday, November 11, 2008

Brown Sugar Cranberry-Orange Oatmeal Scones


As I sat sipping my green tea and eating scones early this morning I had a bit of a scare.

I was watching out the window at my fluffy little dog Duffy sniffing around the side yard when from across the cul-de-sac comes a big red fox...my heart stopped. All I could think of was my little dog was going to be breakfast for this big red fox.

I tapped on the window to distract the dog, ran to the refrigerator for the bag of Boar's Head Ham (the ultimate retrieval device for small fluffy dogs f.y.i.) and dangled a pink slice out the front door. The approaching red fox went completely unnoticed as fluffy little Duffy came running for a piece of ham (pathetic, I know). We have so many foxes in the woods next to our house-it really does make me nervous. This fox was particularly healthy looking for this time of year-often they'll look a little mangy about now which makes me even more nervous.

My scone unfortunately got cold while tending to all this animal drama but a quick reheat in the microwave solved that problem.
One of the things I love about this time of year is that fresh cranberries are once again plentiful in the produce aisle of the supermarket.
While I love the dried variety like Craisins...I really enjoy the unsweetened tartness of fresh cranberries. For this recipe you can use the dried variety if fresh are not available or if you prefer a sweeter scone.

The texture of these scones is a tender almost muffin like texture as opposed to the flaky, drier texture of many scones. A nice addition might be pecans or walnuts if you would like a little crunch.

Brown Sugar Cranberry-Orange Oatmeal Scones

1 2/3 cups all-purpose flour
1/2 cup brown sugar (plus additional for sprinkling)
1 tablespoon baking powder
3/4 teaspoon salt
1/2 teaspoon cinnamon
1 1/2 cups Old Fashioned Oatmeal
12 tablespoons cold butter, sliced into tablespoons
zest of 1 orange, finely chopped
1 cup fresh cranberries
2/3 cup half and half
2 tablespoons orange juice

Preheat oven to 425 degrees. Lightly butter 2 baking sheets or line with parchment paper.

In the bowl of a food processor combine the flour, brown sugar, baking powder, salt, cinnamon and oatmeal; pulse until combined and the oatmeal is somewhat ground. Add the butter and pulse until the mixture resembles coarse crumbs.
Transfer mixture to a large bowl.

Using a wooden spoon stir in the zest and the cranberries. Gradually add the half and half and the orange juice, stir just until combined. Spoon the dough onto a floured work surface. Pat the dough into a 1-inch thick disc.
Using a floured cutter (I used an oval shaped cutter, but round is fine), cut the dough into discs and arrange on the prepared baking sheets.
Brush the tops lightly with a bit of half and half then sprinkle each with about 1/2 teaspoon of brown sugar. Bake in the oven for 18-20 minutes or until edges are lightly browned. Transfer to wire racks to cool or eat them warm from the oven.

Yield: about 1 dozen scones

Monday, November 10, 2008

What is the secret to loving Brussels sprouts?

I wanted to love Brussels sprouts.


As my container of Brussels sprouts rolled up the conveyor belt at the supermarket the cashier excitedly shared how much she loves Brussels sprouts; she loves them so much that she has them growing up the walkway to her house since that's the only area that gets sun. She continued by sharing her favorite recipe for a Brussels sprouts casserole complete with cream and multiple cheeses. I was excited.

I had never tried Brussels sprouts and I really didn't want my kids to grow up and say they've never tried Brussels sprouts either. While I'm a big fan of pretty much anything with cream and multiple cheeses, I wanted to prepare my Brussels sprouts in a less fussy (less fattening) way-they're supposed to be good for you, right? So I turned to a simple recipe from The Barefoot Contessa herself-Ina Garten, for roasted Brussels sprouts. OK so she's not necessarily known for her low fat foods, but she always has reliable recipes for sure.

I prepared them two ways-first true to the recipe and second with the addition of fresh cranberries and pepitas. So?
Yeah, no. The cartoons of my youth were right; Brussels sprouts are not yummy. I did like them a little bit raw. My 12 year old daughter and I chopped up one of the sprouts just after tossing with the oil, salt and pepper and both thought...this is good. But once out of the oven-not so much. I did however love the roasted cranberries and pepitas.
What did I do wrong? Come on Brussels sprouts lovers...what's the secret to loving them? Is it that they must be slathered with cream and cheese or is it that people just force them down like a big, bad pill knowing that they're eating something good for them? Share your secrets. I need to know.
Roasted Brussels Sprouts
Recipe by Ina Garten (The Barefoot Contessa)
1 1/2 pounds Brussels sprouts
3 tablespoons good olive oil
3/4 teaspoon kosher salt
1/2 teaspoon freshly ground black pepper

Preheat oven to 400 degrees.

Cut off the brown ends of the Brussels sprouts and pull off any yellow leaves. Mix them in a bowl with the olive oil, salt and pepper. Pour them on a sheet pan and roast for 35-40 minutes until crisp on the outside and tender on the inside. Shake the pan from time to time to brown the sprouts evenly. Sprinkle with more kosher salt and serve immediately.

My variation: Mix in 1 cup fresh cranberries and 1/4 cup roasted, salted pepitas (hulled pumpkin seeds) and roast as directed.


The cranberry variation...well at least the cranberries and pepitas were yummy: