; Supermarket Serenade: June 2008

Friday, June 27, 2008

"Fries and Rings" Salad with Blue Cheese Vinaigrette


Day 5 of salad week!!

I feel great. Salad for dinner always makes me feel great. In fact I feel so great after an entire week of salads, that today's salad might seem a bit over indulgent. But truthfully it's not all that bad. It's a salad twist on french fries and onion rings-no deep frying, but tasty nevertheless.

If you need a bit more for a hearty start to the weekend, pair this salad with your favorite burger or with one of my favorite burgers.

Red "new" potatoes are the highlight of this salad and obviously represent the "fries". Try to find the small red potatoes in your supermarket as they work best in a salad. If you cannot find the smaller ones, just make sure that you cut the potatoes small enough to be "bite-sized". I have used shallots for the "rings" but you may use either red onions or perhaps Vidalia onions if you would prefer. If you are using onions you may need to cook them a little bit longer so they get a bit of a crispness to them. Truthfully though, shallots-because of their size, I think would work best. Have a great weekend!

"Fries and Rings" Salads with Blue Cheese Vinaigrette

1 lb. small red new potatoes, quartered
2 large shallots sliced into 1/4 inch planks, peeled
2 slices thick cut applewood smoked bacon, cut into 1/4 inch pieces
2 tablespoons extra virgin olive oil
1 teaspoon kosher salt
1/2 teaspoon freshly ground black pepper
8 cups mixed mesclun greens

2 tablespoons white wine vinegar
6 tablespoons extra virgin olive oil
1/4 teaspoon kosher salt
1/4 teaspoon freshly ground black pepper
1/2 cup crumbled blue cheese

Preheat oven to 425 degrees.

Arrange the potatoes, shallots and bacon in a single layer on a baking sheet. Drizzle with the 2 tablespoons of extra virgin olive oil and season with the salt and pepper. Bake in the oven for 35-40 minutes or until potatoes and shallots are golden brown.

Arrange mixed greens on a salad plate. Scatter the potatoes and bacon over the greens, evenly dividing. Separate the shallot planks into rings and scatter over each salad. Serve with the Blue Cheese Vinaigrette.

To prepare the vinaigrette: in a small bowl whisk together the vinegar, olive oil, salt and pepper; gently stir in the blue cheese. Spoon a small portion of the vinaigrette over each salad.

Thursday, June 26, 2008

Arugula Salad in Portobello Mushroom Bowls

Salad week continues with a vegetarian salad today.

It was almost a fast food day and not a salad day at all. My girl broke her arm. There is no exciting story behind it. She broke it in the most benign way-Irish dancing. Who knew Irish dancing was a contact sport? One leap in the air followed by a bad foot plant and now she's sporting a cast the color of a traffic cone. Needless to say what started as a simple day became a little more complicated than planned.


My girl and her best buddy Duffy


I was (surprisingly) able to pull it all together and make my salad as planned.

When I was shopping at the supermarket this week I was drawn to some beautiful extra large Portobello mushroom caps. The caps looked like large shallow bowls waiting to be filled. I think the salad is best when the caps are warm-I really like the contrast of cool and hot in a salad. But if you prefer, you may grill the caps ahead of time and serve them cooled.

I wanted today's salad selection to be a vegetarian one. But if you prefer to have meat of some kind in your salad, I think smoked ham, bacon or prosciutto would be an excellent addition.

Take care when grilling the caps as once they are tender the edges can break easily, so turn over and remove with care.


Arugula, Avocado and Tomato Salad in Grilled Portobello Bowls

4 large Portobello mushrooms caps
2 teaspoons extra virgin olive oil
1/2 teaspoon kosher salt
1/4 teaspoon freshly ground black pepper
4 cups mixed greens with arugula
1 avocado, seeded, peeled and diced
1 large tomato diced (about 1 cup)
1/4 cup diced onion
1 tablespoon freshly grated Parmesan cheese
1 tablespoon chopped walnuts

Walnut Pesto Dressing:
1/4 cup basil leaves, packed
2 tablespoons chopped walnuts
2 tablespoons lemon juice
1 tablespoon water
1/4 cup extra virgin olive oil
1/4 teaspoon kosher salt
1/4 teaspoon freshly ground black pepper

Preheat a grill to medium high heat.

Gently scrape the gills from the underside of each Portobello mushroom and trim down the stem as far as possible.

Lightly brush each cap with the oil and place directly on the grill rack. Grill for 3 minutes then carefully flip with a spatula and grill for an additional 3 minutes. Caps should be lightly browned and just tender.

Arrange 1 cup of the greens in the underside of each mushroom cap. Top each with the avocado, tomato and diced onion. Sprinkle each with Parmesan cheese and walnuts, evenly dividing. Drizzle each salad with Walnut Pesto Dressing.

To make the Walnut Pesto Dressing: combine the basil, walnuts, lemon juice, water, oil salt and pepper in a blender container; blend until smooth.

Yield: 4 salads

Wednesday, June 25, 2008

Sausage & Pepper Hero Salads

Day three of salad week.

On Monday I decided to have a salad week to get my eating back on track after over indulging on a recent amusement park trip. But I suppose I'm teetering on the edge of eating carnival food with the salad I've made for today: Grilled Sausage and Pepper Hero Salads with French Bread Croutons.

My local supermarket had a selection of chicken sausages in the store brand natural food section. There are a lot of different brands of chicken or even turkey sausage out there so you should not have a problem finding them in your supermarket. And the good news is that when you're using sausage a little goes a long way as far as flavor so I'm not really being too bad. If you are feeling extremely calorically generous with yourself today I'm sure shredded provolone would be a tasty addition. I am still being a caloric Scrooge, so no cheese for me.


Grilled Sausage and Pepper Hero Salads with French Bread Croutons

Croutons:
1 cup 1-inch French bread cubes
2 teaspoons extra virgin olive oil
1/2 teaspoon kosher salt
1/4 teaspoon freshly ground black pepper

Dressing:
2 grape or cherry tomatoes
3 basil leaves
1/4 cup extra virgin olive oil
2 tablespoons balsamic vinegar
1 teaspoon Worcestershire sauce
2-3 drops hot pepper sauce (optional)
1/4 teaspoon salt

Salad:
1 large onion, sliced into 1/2 inch thick planks
2 red peppers, sliced into rings, seeds removed
1 teaspoon extra virgin olive oil
1/4 teaspoon salt
4 Italian-seasoned chicken sausages
8 cups shredded Romaine lettuce

Preheat oven to 425 degrees. Preheat a gas grill to medium heat.

In a small bowl, combine the bread cubes, oil, salt and pepper. Spread bread cubes in a single layer onto a baking sheet; bake in the oven for 8-10 minutes or until lightly browned. Let the croutons cool while preparing the dressing. (Croutons can be prepared in the grill on a piece of foil, cook, turning occasionally to avoid burning).

In a blender container, combine the tomatoes, basil leaves, olive oil, vinegar, Worcestershire sauce, hot pepper sauce and salt; blend until well combined and smooth.

Place the onion planks and pepper rings on a large sheet of aluminum foil. Drizzle the onions and peppers with oil. Place directly on the grill rack and cook 4 minutes. Carefully turn peppers and onions using tongs and taking care to not drop rings through the grate. Cook an additional 4 minutes or until rings are just tender and have nice grill marks. Transfer onions and peppers back to the foil while cooking the sausage.

Place the sausage on the grill rack and cook for 8 minutes, turn and cook for an additional 8 minutes.

To assemble salads, divide the Romaine lettuce between 4 serving plates. Top the lettuce on each plate with the peppers and onions. Carve sausage into slices. Scatter the sausage and croutons over each and drizzle lightly with the dressing.


Tuesday, June 24, 2008

Chicken Veronique


Today is day two of my salad week.

I worked this recipe around some pretty looking fresh tarragon I found in the supermarket. I love the classic flavors of chicken, tarragon and grapes in Chicken Veronique. What I don't love is the typical cream laden sauce. Many salad versions I've seen called for heavy mayo - another heavy ingredient I'm trying to avoid. I've created a lighter version that I think tastes just as delicious. It's only been two days of salads-I'm not craving heavy cream sauces...yet.
Chicken Salad Veronique

Salad:
4 boneless skinless chicken breast halves
Water for poaching
1 teaspoon salt
8 cups mesclun greens
1 cup halved red grapes
2 tablespoons coarsely chopped walnuts

Vinaigrette:
3 tablespoons champagne vinegar
2 tablespoon extra virgin olive oil
1 tablespoon water
1 teaspoon finely chopped shallot
1/4 teaspoon white pepper (preferably fresh ground)
1/4 teaspoon coarse salt (such as French Grey)
1 tablespoon finely chopped fresh tarragon

Place the chicken in a shallow saucepan with a lid and add enough water to just cover the chicken. Add 1 teaspoon of salt to the water. Bring water to a boil over medium high heat. Cover the pan, remove from the heat and let sit for 15 minutes. Remove chicken from the water and transfer to a cutting board. Carve the chicken into 1/2 inch thick slices

Divide the greens between 4 serving plates; fan the chicken over the greens. Top each salad with grapes and walnuts.

For the vinaigrette: whisk together the vinegar, oil, shallot, pepper, salt and tarragon. (You may use a small blender if you would prefer).

Drizzle vinaigrette over chicken and greens.

Yield: 4 salads

Monday, June 23, 2008

Roller Coaster Eating


I am declaring this week: Salad Week.

As a celebration for the end of school we took the kids to Six Flags Great Adventure. My two oldest kids are big roller coaster lovers and Great Adventure in Jackson, NJ is sort of a roller coaster mecca. Great Adventure boasts a coaster that is the tallest and the fastest in the world: Kingda Ka. Of course my guys thought it was fabulous...my H and I just waved as they took off with our youngest watching nervously by our sides.
I'm not much of a ride person. I was when I was younger, but it seems for me that with age has come a fear of "death defying" rides of thrill. I'm thrilled enough that I get up every morning. So wandering around a theme park not riding rides leads to one very dangerous (sometimes thrilling) act: eating. I love "carnival" foods-popcorn, cotton candy, funnel cakes, churros, burgers, fries and ice cream. And quite honestly, I'm afraid I may have eaten my weight in carnival food on this trip. It can be very tempting waiting for kids on rides and sitting right next to the grilled burger stand (Six Flags Great Adventure has Johnny Rocket's burgers and they are quite tasty).

So in an effort to get my eating back on track I have declared this week to be salad week. I'm going to have salad for lunch and dinner every day this week. First up is a grilled pork salad with apples topped with a tangy maple scented balsamic vinaigrette. There is a bit of cheddar cheese in the salad but I tried to go very light. The salad also has a sprinkling of pepitas-hulled pumpkin seeds which add a bit of salty crunch. Pepitas can usually be found near the nuts in the produce section of most supermarkets.

Salt and Pepper Grilled Pork Salad with Apples

1 (approximately 1 lb.) pork tenderloin
1 teaspoon extra virgin olive oil
1 teaspoon kosher salt
1/2 teaspoon freshly ground black pepper
8 cups shredded Romaine lettuce
2 large apples, cut into thin wedges, unpeeled
1-2 tablespoons crumbled light cheddar cheese
1-2 tablespoons lightly salted pepitas
Vinaigrette:
1/4 cup balsamic vinegar
2 tablespoons extra virgin olive oil
1 tablespoon water
2 teaspoons pure maple syrup
1/2 teaspoon finely chopped shallot
1/4 teaspoon kosher salt
1/8 teaspoon cayenne pepper

Preheat a grill to medium heat.

Lightly brush the pork tenderloin with the teaspoon of extra virgin olive oil then coat with the salt and pepper. Place the pork on the grill rack and cook, turning occasionally, for a total of 18-20 minutes or until nicely browned and pork registers 140 degrees when a meat thermometer is inserted into the thickest part. Remove from the grill and let the pork rest for about 8-10 minutes before carving into 1/2 inch thick slices.
Divide the Romaine lettuce between 4 salad plates. Arrange the pork slices in the center of the Romaine and fan the apples to the sides. Sprinkle each salad with with the cheddar cheese and the pepitas, evenly dividing.

Rapidly whisk together (you may use a blender) the vinaigrette ingredients until smooth and well blended. Drizzle the vinaigrette over each salad and serve.

Yield: 4 main dish salads

Wednesday, June 18, 2008

Salt of the Earth


"Where would we be without salt?" James Beard


It seems that in life you are either a salty person or a sweet person. A salty person is that person whose go-to snack would be chips and dip or pretzels and cheese. The kind of person who on occasion has had the jumbo bucket of buttered popcorn with free refills at the movie theater and then having eaten it all sheepishly presents the empty bucket to the shocked teenaged girl at the concession stand for a refill (was that a confession?).

A sweet person would instead gravitate first towards anything sweet and sugary: candies, cakes, cookies. I have a good friend (a sweet friend) who always will order a slice of cheesecake as an appetizer in a restaurant. She usually gets a cockeyed look from the waiter but hey, she loves cheesecake. Shocking still is that a sweet prelude to dinner doesn't preclude her from ordering dessert, she just enjoys starting and ending her meal with "sweet".

I on the other hand love all things salty. (OK it was me with the popcorn). My absolute favorite treat: giant soft pretzels drizzled with melted butter. Soft, salty pretzels were the inspiration for the recipe I have today- Grilled Chicken Sandwiches on Himalayan Pink Salt Flatbread.

I was so happy with how my grilled pizza came out that I picked up some more dough at the supermarket. While I was there I decided to go exotic with a special salt selection. I almost always use kosher salt when I am cooking, but I also frequently use French Grey Salt. Today I found Himalayan Pink Salt. Pretty! Pretty! I was definitely drawn to the pretty pink color. Unless you are a super salt fiend go light on this one-it's big and chunky-my kids thought it tasted like "salted salt". But it sure was tasty salted salt.
Just one quick note: I used red pepper flavored oil but you can use plain old evoo-I just like the extra spiciness the pepper flavor provides.
Grilled Chicken Sandwiches on Himalayan Pink Salt Flatbread


Flatbread:
1 package prepared pizza dough (located usually in the deli or bakery section of the supermarket), divided into four equal pieces
1/4 cup flour (I used semolina flour, but all purpose is fine)
1 tablespoon red pepper flavored extra virgin olive oil
1/2 teaspoon freshly ground pepper (I used a three-pepper melange)
2 teaspoons Himalayan Pink Salt

4 grilled chicken breast halves (grilled your favorite way)
1 cup baby arugula
1 avocado, peeled, seeded and thinly sliced
2 tomatoes, thinly sliced
red pepper flavored extra virgin olive oil

Preheat a grill to medium high heat.
Press or roll the 4 dough pieces into equal sized ovals. Lightly flour a baking sheet and press each dough into the flour to shape. Lightly brush both sides of the dough with the oil. Gently press the pepper and the salt, evenly dividing, onto one side of each of the dough pieces. Arrange the dough on the grill rack and cook for 3-4 minutes in a closed grill or until lightly browned on the bottom with nice grill marks. Pop any bubbles that have formed and turn dough over and cook an additional 3 or 4 minutes.


Thinly slice the grilled chicken. Divide the arugula onto two of the flat breads. Arrange the sliced chicken on each. Top with avocado slices and tomato slices. Lightly drizzle each with red pepper oil to taste. Top each with remaining flat breads; cut each sandwich in half.
Yield: 4 sandwiches


Tuesday, June 17, 2008

School's Out BBQ

Holy cow. It's hard to believe but the school year is over. To say that my kids are thrilled would indeed be an understatement. School would have ended last week, but thanks to several (enjoyable) snow days they tacked on a bunch of days ending school oddly on a Monday. Our celebration usually involves either pizza out somewhere or a BBQ. But since my son's summer baseball has already started (does stuff ever end?) and a game was scheduled, we only had time for a BBQ.


Burgers and hotdogs were on the menu:
  • Hotdogs-beef franks are the only ones my kids will eat, specifically Oscar Mayer (they are not "snappy" dogs, you know what I mean?).
  • The beef-always a combination of ground sirloin and ground chuck. I will usually buy a pound of sirloin and a pound of chuck from the supermarket, combine them in a bowl with salt and pepper and then form patties.

Hotdog cooking is pretty basic: throw them on the grill, turn occasionally, when grill marks are to your liking, remove. Hotdogs are pre-cooked, so you are just basically warming them up.Now hamburgers on the other hand take a little more thought. In order to achieve the perfect level of doneness while retaining the perfect level of juiciness, some basic rules need to be followed:

  1. Handle the meat as little as possible. Over working the meat can create tough, compacted patties. Just handle the meat long enough to combine whatever additions you've decided upon, form the patties then let them be.
  2. Always add salt to your meat, a good rule is about a teaspoon for every pound of beef.When the patties are on the grill,
  3. DO NOT press down with your spatula. This is a tough one for a lot of people. I know myself that when I was in High School and proudly wore the paper cap of McDonalds, we pressed down on the patties. It has been a hard habit to break despite the fact that my years at McDonalds were a really long time ago (think pre-electronic cash register). Any hoo, pressing down on the patties while they are on the grill presses all the tasty juices out and can create major grill flare-ups that make for blackened, not-so-tasty patties.
  4. If you are adding cheese, do so immediately after flipping the patties. If you forget the cheese (which I did nationally on the Sutter Home Build a Better Burger Challenge a few years ago on Food Network) DO NOT return the patties to the grill to melt the cheese as it will make your patties overcooked and too dry. Just suck it up and place the cheese on cold, the warmth of the patty will probably melt the cheese enough to make it ok.

Given the recent tomato scares (i.e. Salmonella tainted tomatoes from an unknown source) I used the FDA approved "tomatoes on the vine". They are just fine, but boy I cannot wait until our local tomatoes are here.


School’s Out Burgers with Blue Cheese Mayo

1/2 pound ground beef sirloin
1/2 pound ground beef chuck
1 teaspoon kosher salt
1/2 teaspoon freshly ground black pepper
Oil to brush the grill
4 Sourdough burger rolls, split
1/2 cup mayonnaise
4 ounces blue cheese, crumbled
1 cup baby arugula leaves
1 tomato, cut into 4 slices

Preheat a grill to medium-high heat.

In a large bowl, combine the ground sirloin, ground chuck, kosher salt and the ground black pepper. Form the meat into four equal sized patties. Lightly brush the grill rack with oil. Place the patties on the grill rack and cook 4-5 minutes per side for medium rare, or cook until desired doneness. During the last 2 minutes of grilling, arrange the rolls split side down on the edges of the grill to lightly toast.

Stir the mayonnaise and the blue cheese together in a small bowl.

To assemble the burgers, place the arugula leaves on the bottom half of each roll, evenly dividing. Top the arugula with a patty, followed by a tomato slice. Place a generous dollop of the blue cheese mayo on top of each followed by the roll tops.

Yield: 4 burgers

Tuesday, June 10, 2008

Dough Re Me!


More and more supermarkets seem to be carrying ready to cook pizza dough and I think that is something to sing about. Not to be confused with the frozen bread dough located in the freezer section, pizzeria style dough can usually be found in either the deli area or in the bakery area of large supermarkets. If you cannot find the dough in your local store, try asking your local pizzeria if they are willing to sell some of their dough for you to use at home.

I love using the dough for “Make Your Own Pizza Parties”. I place assorted toppings in small bowls and let my guests choose exactly what they would like on their pizzas. The dough can usually be divided to make 2 or 3 smaller pizzas.

For a time saving tip, try grilling one side of the dough ahead of time for your guests and wrap loosely in foil. When you are ready to finish allow guests to select their desired toppings, and then place the pizzas on the grill to finish.

Today I made a Rosemary Portobello and (for my picky kids) a plain cheese. Try experimenting with different cheeses and herbs; a favorite of mine is blue cheese, walnut and cranberry pizza with a drizzle of fig jam. Next time I might just have my own pizza cook off and award a prize to the most creative or the tastiest pizza…Fa so la ti dough!


Rosemary Portobello Pizza/Cheese Pizza

Cooking spray
1 (16 ounce) package pizza dough (either from the supermarket or from your local pizzeria)
Flour (I used semolina pasta flour)
1/3 cup extra virgin olive oil
1/4 teaspoon cayenne pepper
1 teaspoon salt
8 ounces sliced Portobello mushrooms
1/4 cup pizza sauce (I used Contadina)
1 garlic clove, thinly sliced (optional)
2 cups shredded cheese (a combination of mozzarella and white cheddar)
1/2 teaspoon dried basil
1 tablespoon coarsely chopped fresh rosemary

Preheat a grill to medium heat and lightly spray the grill rack with cooking spray.

Divide the dough into two equal sized balls. Spread some flour onto a baking sheet and place the dough in the flour. Stretch each ball into a 10 inch circle.

Whisk together the extra virgin olive oil, cayenne pepper and 1/2 teaspoon of the salt. Brush the mushrooms with half of the olive oil. Place the mushrooms on the grill rack and grill 2 minutes on each side or until just tender; remove to a plate and sprinkle with the remaining salt.

Brush oil on one side of each of the dough circles and place the dough oil side down onto the grill rack. Close the grill and cook for 4-5 minutes; popping any large bubbles that might form. Using a large spatula carefully remove the crusts from the grill and place back on the baking sheet cooked side up to put toppings on. Brush both sides with the remaining oil.

For the cheese pizza: spread the sauce over the cooked side of one of the crusts. Top with half of the garlic, if desired. Scatter 1 cup of the cheese over the sauce and sprinkle with the dried basil.

For the mushroom pizza: scatter the cheese over the cooked side of the remaining crust. Top with the remaining garlic, if desired. Arrange the mushrooms in a single layer over the cheese and sprinkle with the chopped rosemary.

Place both pizzas back on the grill and cook in a closed grill for an additional 4-5 minutes. Serve immediately.

Saturday, June 7, 2008

Cheese Bread with Dipping Oils for Lobster Fest!


One of the best things about the approaching summer is the exciting food choices that summer brings. Our local Rotary Club Lobster Fest, which takes place tonight, announces the arrival of summer with a butter dipping bang. The event, which raises money for the Rotary’s various community service activities, is enormously popular and is always a sellout. It is a BYOB event held outdoors under a huge tent. The menu includes steamers, a freshly steamed lobster dinner (or steak for the crustacean-phobic, like my husband) and ice cream. There is live music followed by a DJ for dancing into the night…think college spring fest for the “college was probably quite a few years ago” set.

In addition to bringing your own drinks, each table brings an assortment of appetizers. I found some tasty looking flavored oils in the supermarket today by Boyajian Fine Oils. The package includes four small bottles: a roasted chili oil, a lemon pepper oil, a basil oil and a garlic oil I am going to bring a three cheese bread and serve the oils in small bowls for dipping. One suggestion for making this appetizer a bit fancier is to add freshly chopped herbs to each of the oils:

Roasted Chili Oil: add freshly chopped thyme and a pinch of red pepper
flakes
Lemon Pepper Oil: add freshly chopped dill and a few grinds of fresh
pepper
Basil oil: add finely chopped garlic and thinly sliced basil
Garlic oil: add finely chopped garlic and some finely chopped fresh rosemary

The bread is made from a recipe I found on the Panera Bread web site. It’s quite tasty and very simple to make. (Although if you're lucky enough to live near a Panera Bread you can just go there and buy a loaf instead of baking one...but honestly who doesn't love the smell of freshly baked bread?)


Rock Lobster!!!Rock Lobster!!!Oooo aah!Oooo aah!Red snappers snappin'Oooo
aah!Clam shells clappin'Oooo aah!Muscles flexin'Oooo aah!Flippers flippin'Oooo
aah!

Panera Bread Three Cheese Bread
From The Panera Bread Cookbook: Breadmaking Essentials and Recipes from America's Favorite Bakery-Cafe by the Panera Bread Team. Recipes by Ward Bradshaw and Joel Cammett. Copyright © 2004 by Panera Bread.

Starter:
1 cup (8.375 ounces) warm water (95-105° F)
2 teaspoons (0.25 ounces) fresh yeast
1 cup (4.875 ounces) all-purpose flour

Dough:
3/4 cup (5.75 ounces) warm water (95-105° F)
3 tablespoons (2 ounces) honey
4 teaspoons (0.5 ounces) fresh yeast
1/4 cup plus one teaspoon (2 ounces) vegetable shortening
4 3/4 cups (23 ounces) all-purpose flour
1 tablespoon (0.5 ounces) salt
1/2 cup (2 ounces) 1/2-inch cubes Romano cheese
1/2 cup (2 ounces) 1/2-inch cubes Parmesan cheese
1/2 cup (2 ounces) 1/2-inch cubes Asiago cheese
starter (recipe follows)

To create the starter, combine the water and yeast in a medium mixing bowl. Stir to dissolve the yeast fully. Add the flour to the bowl and stir until the ingredients are fully incorporated. Cover with a cloth and ferment the starter at room temperature for 30 minutes.

For the dough, combine the water, honey and yeast in the bowl of a stand mixer. Stir to dissolve the yeast fully. Add the shortening, flour, salt, cheeses and fermented starter. Mix on low speed until the dough is fully developed. Remove the dough from the mixing bowl.
Divide the dough into 2 pieces weighing about 22 ounces each. Set aside any remaining dough and freeze for future use. Roll each piece of dough into a smooth ball. Place the dough on the counter or in a proofing basket and cover with a warm, damp cloth to rest at room temperature for 30 minutes.

Preheat the oven to 400° F.

Form the dough into loaves, cover with a warm, damp cloth and proof at room temperature for 30 minutes.

Score the loaves with a sharp knife, spray with water and bake for 30 minutes, or until the crusts are a deep golden brown and the middle of the loaves is 190-200° F.
Remove the bread from the oven and place on a cooling rack for 30 minutes. If the bread was baked in loaf pans, remove the bread from the pans before cooling.
Makes 2 loaves

Thursday, June 5, 2008

Yogurt for Dessert

Yogurt is a food I had to teach myself to enjoy.

When I was pregnant and nursing my children, like any responsible mother-to-be, I wanted to make sure I was getting enough calcium so I decided to add yogurt to my diet. The initiation was a gradual one. I began with the whipped variety of yogurt-its light and fluffy texture made it seem more like flavored whipped cream than yogurt and certainly seemed more palatable to me. I cut the yogurt with fat free Cool Whip to lessen what I perceived as a sour "yogurty" taste and to make it more like a mousse. The amount of Cool Whip was then gradually reduced to none and after a time I was able to enjoy regular yogurt. Fast forward a few years and now I think yogurt is so tasty, I serve it for dessert.

While I now enjoy many varieties of yogurt, at the moment I am a big fan of Yoplait's Yo Plus Digestive Health yogurt. I like that it has some fiber in it as I am making a conscious effort to add more fiber to my diet.
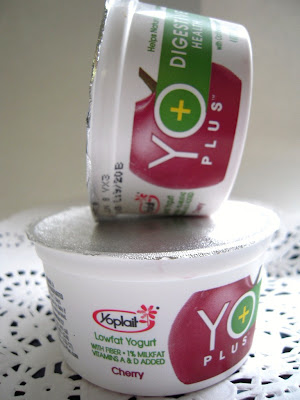
Yo Plus is a new yogurt in supermarkets that, according to Yoplait's web site, combines:
probiotics-active cultures to regulate the balance of
microorganisms in your digestive system and prebiotic cultures for a
healthy digestive system.
prebiotics- natural dietary fibers.

It does contain added sugar, but I am using it for dessert. Perhaps the 3 grams of fiber can make up for the added sugar-that's what I'll tell myself anyway.
Cherry season is in full swing, so I whipped up some Cherry-Almond Yogurt Parfaits. If the fat and calories from the whipped cream scare you, feel free to substitute some fat free Cool Whip, or if you would like to make the parfait for breakfast, just skip the cream completely.

Just a few cherry pitting pointers:

  • You can use one of those cherry pitters that are out there but quite honestly they are a lot of work and don't seem to work all that well.
  • I just quarter the cherry with the pit in and then pull apart and discard the pit.
  • Or if you are really lazy (and sometimes I am) just halve the cherry, pull apart, eat the part with the pit in it (spitting out pit) and just halve the remaining half for your recipe...it will take you twice as long, but mmmm-mmm.

Cherry-Almond Yogurt Parfaits

1 cup chilled heavy cream
1/4 cup sugar
1 teaspoon almond extract
1/2 pound fresh cherries, quartered, pits removed (your choice of method)
4 (4 ounce) containers cherry flavored yogurt (I used the Yoplait Yo Plus)
1/2 cup slice almonds

Beat the heavy cream and sugar using an electric mixer on high speed until stiff peaks form; fold in the almond extract.

Divide 1/3 of the whipped cream between 4 parfait glasses. Add a layer of cherries followed by a layer of the yogurt, using half. Scatter a layer of sliced almonds. Repeat with a layer of whipped cream, cherries, yogurt and almonds. End with whipped cream followed by the remaining cherries. Serve immediately or chill until ready to serve.


Tuesday, June 3, 2008

Ravishing Radishes

"A tiny radish of passionate scarlet, tipped modestly in
white" - Clementine Paddleford


When I scan the produce department I am always drawn to the bright red radishes; their shape and color making them (from far away, anyway) almost look like ruby colored candies. I love radishes as an ingredient; they add a distinct peppery flavor and a cool, crisp texture. My supermarket was bursting with radishes today and I just had to have some.

We are still struggling along without a kitchen. We're eating a lot of sandwiches. But quite honestly (I know I've said this about avocados, but...) I think sandwiches are quite possibly the world's most perfect food. Think about it. Sandwiches can combine all your food groups in one neat, tasty package. In terms of portion control-assuming you are not exceedingly generous with the condiments-that Jared Fogle (he's the Subway sandwich guy) was really on to something.

No one is complaining around here. With all of the winding down of school activities and end of school year festivities sandwiches are probably what we would be having even if I had a kitchen.

These chicken sandwiches have a very slight bite to them, but if you would like to up the spice a bit just add a little more cayenne or a little more black pepper. For some of the sandwiches I washed some of the radish greens and tossed them in with the romaine-it was delicious. (I had actually never eaten the greens before, but I googled it and found that they were fine to eat - what do I know?) The flavor was very much like arugula-which I love.


Grilled Chicken Sandwiches with Baby Romaine and Radish Salad

1/3 cup balsamic vinegar
1/2 cup extra virgin olive oil
1/4 teaspoon cayenne pepper
1/4 teaspoon freshly ground black pepper
1 teaspoon kosher salt
6 Thin sliced boneless, skinless chicken breast cutlets
3 cups baby romaine lettuce leaves
1/3 cup thinly sliced red radishes
6 soft baguette/hoagie style rolls, split and lightly toasted
1/2 red onion, very thinly sliced
3 avocados, peeled and seed removed, then very thinly sliced

Rapidly whisk together the balsamic vinegar, olive oil, cayenne pepper, black pepper and 1/2 teaspoon of the kosher salt. Measure out 1/4 cup of the vinaigrette and set aside.

Arrange the chicken in a marinating container or large zipper top plastic bag; pour the remaining vinaigrette over the chicken. Marinate the chicken for 30 minutes.

Preheat a grill to medium high heat. Remove the chicken from the marinade and place on the grill rack; discard the marinade. Cook the chicken in a closed grill for 4 minutes, flip the chicken and cook an additional 3 minutes. Remove the chicken from the grill, season with the remaining 1/2 teaspoon of kosher salt and let rest.

Combine the romaine and the radish slices in a large bowl and pour the reserved vinaigrette over; stir to combine.

To assemble the sandwiches, arrange a chicken breast cutlet on the bottom half of each roll. Top the chicken with the sliced onion and the sliced avocado, evenly dividing. Using tongs, divide the romaine and radish salad between each sandwich arranging on top of the avocado. Slice each sandwich diagonally in half and serve.

Yield: 6 sandwiches