; Supermarket Serenade

Thursday, August 27, 2009

Barefoot Contessa White Pizza

It's Barefoot Thursday! Barefoot Thursday is the day when a group of food bloggers (known as "Barefoot Bloggers") with deep admiration for the Barefoot Contessa-Ina Garten, all prepare a delicious recipe from one of her many cookbooks. This week's recipe was chosen by Andrea of Nummy Kitchen.


We are a pizza family. Some of my best memories involve pizza. The very first "meal" I ever purchased with my very own money was a slice of cheese pizza and an icy cold coke from Salvatore's pizza in East Northport, New York; I was eight and I remember feeling incredibly proud when I dropped the crumpled bills on the counter to pay. My favorite college meal was a (huge) slice of Rocco's pizza and 1/2 chicken Parmesan hero that I would split with my roommate Ginger in the Bronx, New York. After getting engaged my now husband and I grabbed two slices of Sicilian from Umberto's on Long Island before heading to a friend's baby shower (that remains my favorite slice of pizza to this day).

Last summer when I was getting my new kitchen put in I experimented a lot with cooking my own pizzas on the grill. I burned quite a few, but all in all they came out great. (In fact one of the pizzas I came up with then was a steak pizza which I will be preparing at The National Beef Cook off in Sonoma in a few weeks...so I was happy to make this barefoot blogger pizza in order to have a little bit of practice with dough stretching!)

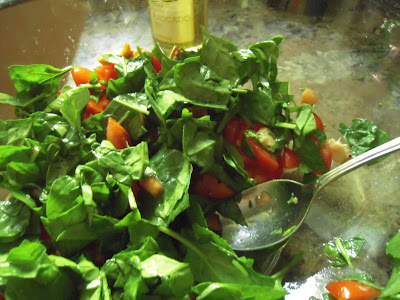
I was actually a little skeptical about this recipe which is essentially salad on a pizza but I must say it was fabulous! I made a few changes...I did not have arugula so I substituted fresh baby spinach and I just cannot stomach goat cheese so I substituted Manchego cheese-not really the same texture as the goat cheese, but I was happy with the results. The lemon vinaigrette was an absolutely wonderful complement to the cheeses on the pizza. I added some thin slices of plum tomatoes from the local farm stand to one of the pizzas and that was delicious too. Making pizza at home has really never been easier...while making a homemade crust is wonderful, I am grateful that most well stocked supermarkets carry ready to stretch doughs to make pizza creation at home a snap!

Barefoot Contessa's White Pizza

Ingredients
For the dough:
1 1/4 cups warm (100 to 110) water
2 packages dry yeast
1 tablespoon honey
Good olive oil
4 cups all-purpose flour, plus extra for kneading
Kosher salt
4 cloves garlic, sliced
5 sprigs fresh thyme
1/4 teaspoon crushed red pepper flakes
For the topping:
3 cups grated Italian fontina cheese (8 ounces)
1 1/2 cups grated fresh mozzarella cheese (7 ounces)
11 ounces creamy goat cheese, such as Montrachet, crumbled
For the vinaigrette:
1/2 cup good olive oil
1/4 cup freshly squeezed lemon juice
Freshly ground black pepper
8 ounces baby arugula
1 lemon, sliced

Directions:
Mix the dough.
Combine the water, yeast, honey and 3 tablespoons of olive oil in the bowl of an electric mixer fitted with a dough hook. When the yeast is dissolved, add 3 cups of flour, then 2 teaspoons salt, and mix on medium-low speed. While mixing, add up to 1 more cup of flour, or just enough to make a soft dough. Knead the dough for about 10 minutes until smooth, sprinkling it with the flour as necessary to keep it from sticking to the bowl.

Knead by hand.

When the dough is ready, turn it out onto a floured board and knead it by hand a dozen times. It should be smooth and elastic.

Let it rise.

Place the dough in a well-oiled bowl and turn it to cover it lightly with oil. Cover the bowl with a kitchen towel and allow the dough to rise at room temperature for 30 minutes.
Make garlic oil.

Place 1/2 cup of olive oil, the garlic, thyme and red pepper flakes in a small saucepan and bring to a simmer over low heat. Cook for 10 minutes, making sure the garlic doesn't burn. Set aside.
Preheat the oven to 500 degrees. (Be sure your oven is clean!)
Portion the dough.

Dump the dough onto a board and divide it into 6 equal pieces. Place the doughs on sheet pans lined with parchment paper and cover them with a damp towel. Allow the dough to rest for 10 minutes. Use immediately, or refrigerate for up to 4 hours.
Stretch the dough.

Press and stretch each ball into an 8-inch circle and place 2 circles on each sheet pan lined with parchment paper. (If you've chilled the dough, take it out of the refrigerator approximately 30 minutes ahead to let it come to room temperature.)

Top the dough.
Brush the pizzas with the garlic oil, and sprinkle each one liberally with salt and pepper. Sprinkle the pizzas evenly with fontina, mozzarella and goat cheese. Drizzle each pizza with 1 tablespoon more of the garlic oil and bake for 10 to 15 minutes, until the crusts are crisp and the cheeses begin to brown.

Make the vinaigrette.

Meanwhile, whisk together 1/2 cup of olive oil, the lemon juice, 1 teaspoon salt and 1/2 teaspoon pepper.

Add the greens.

When the pizzas are done, place the arugula in a large bowl and toss with just enough lemon vinaigrette to moisten. Place a large bunch of arugula on each pizza and a slice of lemon and serve immediately.

TIP Make sure the bowl is warm before you put the water and yeast in; the water must be warm for the yeast to develop.
TIP Salt inhibits the growth of yeast; add half the flour, then the salt, and then the rest of the flour.
TIP To make sure yeast is still "alive," or active, put it in water and allow it to sit for a few minutes. If it becomes creamy or foamy, it's active.

Tuesday, August 25, 2009

Quick Beach Tortellini Salad

As summer eases to its inevitable end, I find myself rushing to squeeze in the forgotten fun things I had placed on the summer bucket list. This past weekend my daughter danced at a Celtic festival in Mystic, CT which I'm thrilled to report allowed us to sneak over to my very favorite summer eating place: Abbott's Lobster in the Rough.

Nestled on Connecticut's shoreline in cozy Noank, CT, Abbott's is a true summer treat...they serve assorted seafood including my "dream about it all winter long" favorite meal: Hot lobster rolls on toasted buns with melted butter...mmmmm. Maybe we can squeeze one more trip in before they close in the fall...

We made one last trip to the beach before school starts...just the sound beach-I was too afraid of hurricane waves to go to the ocean beach...I know, wimpy. I tossed together a tortellini salad to use up some tasty summer plum tomatoes and some Avocado oil from the supermarket. I think you'll love the rich flavor the avocado oil gives the salad-but if you can't find it in your supermarket olive oil would make a good substitute.

Cracked Pepper Avocado Lime Tortellini

4 plum tomatoes
2 cups coarsely chopped baby spinach leaves, packed
1 lime
1 teaspoon kosher salt
3/4 teaspoon freshly ground black pepper
9 ounces cheese filled tortellini
1/2 cup small diced cooked chicken
1/4 cup avocado oil
1 avocado, diced

Dice the tomatoes and place in a large bowl with the spinach.
Remove the zest from the lime and finely chop; add to the bowl with the tomatoes. Squeeze in the juice from 1/2 the lime. Stir in 1/2 teaspoon of the salt and the 3/4 teaspoon of pepper.

Cook the tortellini according to package directions just until tender, drain and stir into the bowl with the tomatoes and spinach. Stir in the chicken, avocado oil and the remaining salt. Gently stir in the avocado and squeeze in the juice from the remaining lime half. Serve at room temperature.

Yield: 6 servings

Thursday, August 13, 2009

Barefoot Bloggers...Mango Banana Daiquiris

Today is Barefoot Thursday! That day when food bloggers near and far all prepare a delicious recipe created by the beloved Barefoot Contessa herself, Ina Garten. Why don't you join us?

Not sure if anyone noticed but in bit of overzealous excitement (it was my turn to choose) I posted this last Thursday. Then I surfed around fellow barefoot bloggers blogs and noticed not a single one posted. Why? Because I was a week early!! Ooops! This week's recipe is for Mango Banana Daiquiris and they were just the island treat I needed. I am a mango freak...I love them! I could eat them breakfast lunch and dinner and now I can drink them in between.

When I selected this week's recipe (yes! it was my turn to choose) I knew that I would just be getting back from our Caribbean cruise and I just knew I would need a little something to bring me back to the islands if only for just a few moments! It was unfortunate that my drink was not served to me as I lounged on my deck chair by the pool or that I didn't have fabulous Daiquiri glasses to serve them in, but they were nevertheless delicious. I prepared one batch with the rum for the adults and one batch sans liquor for the kiddies. I have to say I would love to drink one of these every morning (without the rum of course!).


Here's a few super tips on selecting mangoes from your supermarket:

Look for mangoes with multiple colors-reds, yellows and a touch of green on
them.
Mangoes should give slightly when you press on them...not too much
though as you don't want them to be mushy.
Avoid mangoes with blemished skin, try to find smooth, undented fruit.

Mango Banana Daiquiris

By Ina Garten


2 cups chopped ripe mango (1-2 mangos, peeled and seeded)
1 ripe banana, chopped
1/2 cup freshly squeezed lime juice (4 limes)
1/4 cup sugar syrup*
1 1/4 cups dark rum
Mango slices for serving


Place the mango, banana, lime juice, sugar syrup and rum in a blender and process until smooth. Add 2 cups of ice and process again until smooth and thick. Serve ice cold in high ball glasses with mango slices.


*to make simple syrup, heat 1 cup of sugar and 1 cup of water in a small saucepan until the sugar dissolves. Chill.

Here's a little St. Thomas shot...ahhhhh...I need to go back...

Thursday, August 6, 2009

Chicken and Potatoes from The Next Food Network Star

Sadly I am back from vacation and I am seriously resenting not being waited on hand and foot. What I would give right now for a friendly fellow to walk by and offer me a drink in a coconut shell...ah well...I guess my cup of green tea will have to suffice.

I spent the morning at the supermarket restocking and I spent last night catching up on my Tivo. I was excited to see that the contestant I was rooting for on The Next Food Network Star, Melissa, took home the title. Aside from being impressed with the fact that she has 4 children under 4 and she still has the energy to want to be the Next Food Network Star I just really like her-she has a very friendly personality.

For her pilot show on the finale she created a "four step chicken" with some rather tasty looking potatoes that I just had to try. The chicken is really just your basic sauteed chicken with a pan sauce so that wasn't what attracted me to her dishes it was the potatoes. She made some delicious looking mini gratins in a muffin tin that I just had to taste.
I only made two slight changes to the chicken recipe: shallots instead of red onion and rosemary instead of thyme. For the potatoes I followed exactly except I did not peel the potatoes...I'm a skin girl. Melissa served the chicken on a bed of spinach-which I love, but I happened to have some beautiful summer squash from the farmer's market so I made that instead.

I could not believe how simple and how delicious the potatoes were.(The chicken was good too, but I sure did love those potatoes). I know that I will be making these potatoes a lot...there are just so many ways that you could change them up: cheddar and a little Southwest seasoning for a Tex-Mex version, perhaps some blue cheese and walnuts to pair with a nice steak.
Delicious!

Rustic Lemon Onion Chicken
by Melissa D'Arabian

4 boneless, skinless chicken breast halves, sliced in half crossways (butterflied, cut all the way through)
1 teaspoon dried thyme, plus 1 small bunch fresh thyme, leaves chopped
Salt and freshly ground black pepper
4 tablespoons olive oil
1/4 cup all-purpose flour
1 red onion, thinly sliced
1/4 cup white wine, optional
1 cup chicken broth
3 lemons, juiced
1 to 2 tablespoons butter
Spinach "bed", recipe follows
Directions
Season chicken with dried thyme and salt and pepper. Heat a large saute pan over medium heat and add the oil. Dredge the chicken in flour, add to the hot oil and saute until cooked through. Set chicken aside to rest on plate tented with foil.
In same saute pan, over low heat, add onions and fresh thyme and cook until aromatic.
In a measuring cup, measure out wine, if using, and broth, and add the lemon juice. Turn the heat up to high, and deglaze the pan with the broth mixture until starting to reduce.
Remove the pan from the heat and finish the sauce by whisking in butter. Season with salt and pepper, to taste.
Arrange the chicken on serving plates; Spoon the sauce over the chicken and serve.
5-Minute Individual Potato Gratins
by Melissa D'Arabian

Vegetable spray
2 large russet potatoes, roughly peeled and thinly sliced
1/2 cup grated Swiss cheese
2 green onions, finely chopped
Salt and freshly ground black pepper
3/4 cup heavy cream
Directions
Preheat oven to 375 degrees F.
Spray 8 muffin tins with vegetable spray. Layer potato slices, cheese, and onions into each muffin cup. Season with salt and pepper and top each gratin with 1 or 2 tablespoons of heavy cream. Cover with foil and bake for 30 to 40 minutes, removing the foil halfway through cooking time. Invert gratins onto plate and serve.

Quick and Easy Sauteed Summer Squash
by me!
2 teaspoons extra virgin olive oil
2 teaspoons butter
1 teaspoon minced shallot
1 small yellow summer squash, cut into 1/4 inch thick slices
1 small zucchini, cut into 1/4 inch thick slices
1 tablespoon finely chopped fresh rosemary
1/4 teaspoon kosher salt
1/4 teaspoon freshly ground black pepper
Heat the oil and the butter in a 12 inch non-stick skillet over medium high heat until sizzling; add the shallot and cook until tender.
Stir in the squash, zucchini and rosemary and cook for 2 minutes, using a spatula turn squash over and cook for an additional minute or two, making sure to not let the squash get soft.
Season squash with the salt and pepper. Serve immediately.

Thursday, July 23, 2009

Peach & Blueberry (or Raspberry) Crumbles

Do you ever have one of those days when you just get something in your head and that's just it-it's stuck there? I had one of those days today.

Before I left for the supermarket I looked over the recipe for today's Barefoot Blogger recipe not once but twice just to be sure. But for some reason once I got to the store I just had it in my head that we were making Peach and Raspberry Crumbles. It didn't matter that my list said blueberries...I knew it was raspberries...I knew I simply wrote blueberries by mistake. Guess what? The list was right.
As I am sure you may have surmised today is Barefoot Thursday, the day when countless food bloggers across the blogosphere prepare a delicious recipe created by the infamous Ina Garten-a.k.a. The Barefoot Contessa. Today's recipe was selected by Aggie of Aggie's Kitchen-she selected (as you already know) Peach and Blueberry Crumbles. Why don't you join us next month preparing a Barefoot Blogger recipe?

I made only one change and that obviously would be that I used raspberries instead of the called for blueberries. But I have to say...raspberries worked out just grand. Not to sound like sour grapes (or blueberries as the case may be) but I like raspberries better anyway.

The recipe was delicious...peaches are so tasty right now so it could not have been a more timely selection-Thanks, Aggie.

Peach & Blueberry Crumbles
Ina Garten from The Barefoot Contessa at Home

For the fruit:
2 pounds firm, ripe peaches (6-8 peaches)
2 teaspoons grated lemon zest
2 tablespoons freshly squeezed lemon juice
1/2 cup granulated sugar
1/4 cup all-purpose flour
1 cup fresh blueberries (1/2 pint)...or you may use raspberries!
For the crumble:
1 cup all-purpose flour
1/3 cup granulated sugar, lightly packed
1/2 teaspoon kosher salt
1/4 teaspoon ground cinnamon
1/4 pound (1 stick) cold unsalted butter, diced

Preheat the oven to 350 degrees.

Immerse the peaches in boiling water for 30 seconds to 1 minute, until their skins peel off easily. Place them immediately in cold water. Peel the peaches, slice them into thick wedges and place them in a large bowl. Add the lemon zest, lemon juice, granulated sugar, and flour. Toss well. Gently mix in the blueberries. allow the mixture to sit for 5 minutes. spoon the mixture into ramekins or custard cups.
or the topping, combine the flour, granulated sugar, brown sugar, salt cinnamon, and the butter in the bowl of an electric mixer fitted with a paddle attachment. Mix on low speed until the butter is the size of peas. Rub the mixture with your fingertips until it's in big crumbles, then sprinkle evenly over the fruit. Place the ramekins on a sheet pan lined with parchment paper and bake for 40-45 minutes, until the tops are browned and crisp and the juices are bubbly. serve warm or at room temperature.

If you want to make these early, store the unbaked crumbles in the refrigerator and bake before dinner.

Monday, July 20, 2009

What can I bake with surplus M&M's?

I love it when a new movie comes out and candy companies like M&M/Mars roll out collector edition versions of their candies. While I am a big movie goer (and proud to say a charter member of Netflix) I am not what you would call a collector of movie paraphernalia so it’s not for that reason that I get excited; but rather it is because 9 times out of 10 a few weeks down the road when the movie is but a distant memory and the American consumer has moved on to the next big thing the collector packages go on clearance.

Such is the case with my recent purchase of M&M’s Transformer’s Revenge of the Fallen (was that really a movie? No one in my house cared) I was able to nab a few bargain bags of half priced Transformer M&M’s!

While I easily could have inhaled each bag, (I am in fact an M&M addict-plain not peanut…sometimes almond…never dark and certainly never those over-priced M&M premium flavors.) I showed constraint and decided to look for some recipes that used M&M’s. (Yeah that’s it"…kids don’t eat them, Mom bought them to bake with.")

As luck would have it my cooking contest/blogger friend Anna from Cookie Madness had a yummy (easy) recipe on her blog for Chocolate Chip Pretzel Bars so I gave them a go. I made one slight alteration-I replaced half of the semi-sweet chocolate chips with butterscotch chips (I sure do love those butterscotch chips). Not surprisingly the bars were loved by all. My daughter thought that they would make a delicious base for an ice cream sundae while they were still warm…unfortunately we only had mango sorbet in the fridge…ahhh..next time. OK so that takes up about 1/2 cup of M&M’s any suggestions on things to make with remaining? (I bought 3 bags...c'mon...they were on sale!!)

Chocolate Chip Pretzel Bars
by Anna at Cookie Madness (from Food & Wine)
1 cup all purpose unbleached flour (135 grams)
1/2 teaspoon baking soda (2 ml)
1/4 teaspoon salt (1 ml)
6 tablespoons unsalted butter (85 grams)
1/2 cup light brown sugar (110 grams)
1/4 cup granulated sugar (48 grams)
1 teaspoon vanilla (5 ml)
1 large egg
3/4 cups pretzels, broken
1 cup semi- sweet chocolate chips
1/3 cup M&Ms (plain) – more if you want

Preheat oven to 350 degrees F. Line an 8 inch metal pan with foil and spray with cooking spray (or use parchment).

Mix together the flour, soda and salt; set aside.

Beat the butter and both sugars in a mixing bowl. When light, beat in the vanilla. Add the egg and beat until it’s mixed, then gradually stir in the flour mixture, followed by the pretzel pieces, chocolate and M&Ms.
(I don't normally like to eat cookie dough because my mom warned me about the raw eggs and all, but this m&m studded dough was pretty darn tempting)
Spread mixture evenly in pan and bake on center rack for about 25 minutes or until golden brown. Let cool completely. Lift from pan and cut into bars.

Monday, July 13, 2009

Roasted Two Pepper Orzo and My Very Favorite (easy) Grilled Steak


Just about every woman I know has a go-to little black dress hanging in her closet. I have a fabulous black satin trimmed sheath dress that I like to think of as my dress-up, dress-down, never let me down stand by.

Well, I like to think of skirt steak as the little black dress of beef. Always tasty, always easy to cook with it never lets me down; it's the one meat I always keep in the freezer for that "just in case" moment. You can dress it up with a fancy blue cheese sauce or dress it down and serve it in a casual fajita, but tender skirt steak, fancy or casual, completes a menu much like your little black dress completes your wardrobe.

I've gone casual in my steak prep today, using a tasty marinade found in your supermarket: Durkee Grill Creations Black Peppercorn Marinade. Quick and easy, this ready to mix marinade gives your steak a nice, peppery kick; it's my very favorite supermarket marinade mix.

Keeping the pepper theme going, I paired the steak with a spicy Roasted Two Pepper Orzo that's equally easy to make and a perfect complement to the peppery steak. Don't be intimidated by roasting the peppers yourself-it could not be easier and the fresh roasted flavor is worth the effort. Use extra care when removing the skins from the jalapeno peppers-they're very hot and if you're not wearing gloves, be sure to wash your hands before touching your eyes...I can tell you from experience...it will burn!

Roasted Two Pepper Orzo with Charred Lime
1 red pepper
2 jalapeno peppers
1 lime, thinly sliced
32 ounces chicken broth
4 cups water
1 1/2 cups orzo
1/4 cup extra virgin olive oil
2 tablespoons finely chopped cilantro
1 teaspoon kosher salt
4 ounces fresh mozzarella cheese, cut into small dice
Preheat a grill to medium high heat.

Place the peppers directly on the grill rack and cook, turning occasionally, until charred on all sides. Place the charred peppers in a bowl and cover with plastic wrap; let peppers sit for 10 minutes to allow the skin to loosen slightly.
Carefully grill the lime slices 1-2 minutes per side until grill marks appear.
Bring the chicken broth and water to a boil in a large pot; add the orzo and cook for 7 minutes or until tender. Drain the orzo and transfer to a large bowl; toss with the oil, cilantro and salt.

Carefully remove the skins, seeds and membranes from the peppers. Finely chop the peppers and stir into the orzo along with the mozzarella and the limes.

My Very Favorite (easy) Grilled Steak

1 1/2 pounds skirt steak
1 packet Durkee Grill Creations Black Peppercorn Marinade
1/4 cup extra virgin olive oil
1/4 cup water
1/4 cup balsamic vinegar
1 teaspoon kosher salt

Place the skirt steak in a marinating bowl or large zipper top plastic bag. Whisk together the Durkee marinade, oil, water and vingear; pour over the steak. Allow steak to marinate for at least 15 minutes.

Preheat a gas grill to medium high heat. Remove steak from the marinade and place on the grill rack; grill steak 3 minutes per side for medium rare or continue grilling until desired doneness. Transfer steak to a cutting board, season with the kosher salt then allow the steak to rest for 5-8 minutes. Carve the steak diagonally into 1/4 inch thick slices.