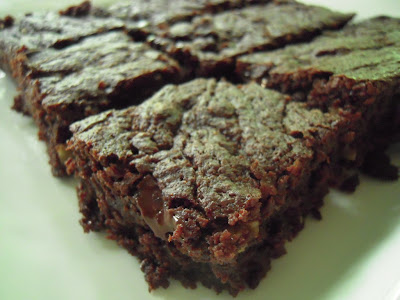
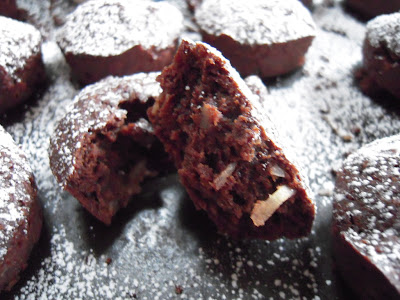
; Supermarket Serenade: chocolate
Showing posts with label chocolate. Show all posts

Wednesday, December 9, 2009

Quick Sour Cream Cupcakes

A few weeks ago I spent a rainy afternoon in New York City on a shopping trip. Albeit very wet, the shopping trip was a lot of fun, I found some wonderful deals at Century 21 (cool, cool store), scouted out some future purchases at Saks Fifth Avenue (i.e. stuff I hope will one day soon appear on the racks of Marshalls or TJ Maxx given that their SFA prices were a little too steep for my budget). But without question the highlight of my my trip was a little detour into the Magnolia bakery for cupcakes.

I love cupcakes. Cupcakes are usually smaller than a slice of cake so I don't feel too guilty indulging (at least that's my rationalization). This particular day, rainy as it was, I waited on the relatively short line for a (famous) Magnolia cupcake. I ordered two. I know I should only have had one but the pressure of the line behind me made it impossible for me to make a quick decision and choose between a snickerdoodle cupcake and a red velvet one. Once outside I huddled with my friends under an umbrella and ate the snickerdoodle one; not quite satisfied I greedily ate the red velvet one. The red velvet one wins...both were fabulous, but boy that red velvet one..mmmmm.

Since the trip I have been obsessed with all things cupcakes. I will admit that I am really not much of a baker and I seem to have difficulty finding a home made cake/cupcake recipe that produces a light, fluffy cake/cupcake as opposed to a heavy dense one. Any suggestions?? As a result of my baking deficiencies I have turned to box mixes with a few alterations to make them more homemade tasting.

One of my favorite boxed mixes is the Ghiardelli chocolate cupcake mix. The mix which I purchased at a big warehouse store included two bags of mix, two bags of frosting mix and cupcake wrappers. The first time I made the cupcakes I made it just as directed, but found it to be just too chocolaty and the frosting to be way too thick. So second time around I decided to make some slight changes. I replaced the oil called for in the recipe with 3/4 cup of sour cream and instead of using the frosting mix (I'll save it for something else...maybe sandwich cookie filling?)I made a quick sour cream butter cream. The results were fabulous! The cupcakes were tender and fluffy and the creamy vanilla frosting was just the contrast the chocolaty cupcakes needed.

Quick Sour Cream Cupcakes

1 pouch of Ghiardelli cupcake mix
2 eggs
3/4 cup water
3/4 cup sour cream

Preheat oven to 350 degrees. Stir ingredients in a large mixing bowl until well combined. Line 12 muffin cups with the foil liners. Divide the batter between the liners and bake for 18 minutes. Cool completely before frosting.


Sour Cream Butter Cream Frosting

1/2 cup butter, room temperature
2 cups powdered sugar
1/4 teaspoon vanilla extract
1/4 cup sour cream

Beat the butter with an electric mixer until light and fluffy. Gradually add the sugar, beating to combine. Add the vanilla and sour cream, beat for 3-4 minutes.

Tuesday, October 6, 2009

Peanut Butter Lover's Cookie

I wish that I was one of those people that could eat anything. I wish also that when I baked cookies or cakes or even purchased them from the supermarket that I had that innate something that allowed you to perfectly portion treats without over indulging. What I am trying to say is that I have no self control...no ability to stop. An open package of Oreos (my true cookie love) can without much thought become an empty package. A plate of neatly stacked, homemade brownies, still warm from the oven, can become a plate of crumbs without as much as a second thought. It is for that reason that I seldom bake.

While creating irresistible treats is one of the pitfalls of baking for me, I do still enjoy baking. I love the feeling of success felt when a batch of cookies comes out just how it is supposed to. It is a great feeling when a pie recipe, once only made perfectly by my mother, comes out just how she would have made it (well, almost).

This past weekend I felt what I like to refer to as “the pull of the oven”. Not unlike the gravitational pull of the moon, the pull of the oven is the season, time of day or time of year, when for the taste of, the accomplishment of, or simply the smell of sweet “somethings” you are compelled to bake.

Given my temptation shortfall, I decided that I would bake something but it would be something that I probably would not eat. Consulting my (short) list of less-preferred baked goods, I fell upon peanut butter cookies. Not that I have anything against peanut butter-nothing tastes better on a Ritz cracker-I just for whatever reason, have never enjoyed peanut butter in baked goods. My other reason for choosing peanut butter-less self deprecating-is that I have a humongous jar of “natural” peanut butter that I purchased for my daughter to make peanut butter sandwiches for school which she has since decided is too “liquidy” and she would not use it (apparently she’s a Jif or Skippy only girl-who knew?).
Spatula in hand, I googled for peanut butter cookies looking for one that would use the most peanut butter. I found cookies that ranged from using as little as a 1/4 cup to as much as an entire jar of peanut butter. I ultimately settled on a recipe using an entire jar from AllRecipes.com. This cookie-not for the peanut butter faint of heart-packs a real peanutty flavor. Knowing that my kids would not like the crunch of added peanuts, I left out the listed 1 cup replacing it with milk chocolate chips for a “Reese’s-peanut-butter-cup-like” flavor. They came out so beautifully that yes… even I could not resist trying them. I really liked the texture; they were fluffy in the centers but slightly crisp at the edges. The taste was too peanut buttery for a non-peanut butter person such as me, but my kids really enjoyed them and recommend them highly.

My only critique of the preparation of these cookies is that when I went to make the cross marks using a fork, the fork kept sticking. Not being a regular peanut cookie baker I don't know if that's normal or not...anyway, just watch out for that! Also I followed the suggestion of one commenter on the Allrecipes site to chill the dough in a log that way you can slice and bake. It's a lot of dough though so you might want to make a few logs.

The Whole Jar of Peanut Butter Cookies
from Allrecipes.com Submitted by Kevin Ryan

1 cup butter, softened
1 cup white sugar
1 cup packed brown sugar
2 eggs
1 egg yolk
1 teaspoon vanilla
1(18 ounce) jar Peanut Butter*
2 cups all-purpose flour
1 teaspoon baking soda
1/2 teaspoon salt
1 cup chopped peanuts (which I replaced with milk chocolate chips)

*Since I was using the "natural" kind of peanut butter which is very liquidy, I only used about 16-17 ounces of peanut butter.

In a large bowl cream butter, white sugar and brown sugar until smooth. Add the eggs, yolk and vanilla; mix until fluffy. Stir in the peanut butter. Sift together the flour baking powder and salt; stir into the peanut butter mixture. Finally stir in the peanuts (or chocolate chips). Refrigerate dough for at least 2 hours.

Preheat oven to 350 degrees. Lightly grease a baking sheet. (I chose to line baking sheets with parchment paper-much easier!)

Roll dough into walnut sized balls.
Place on prepared baking sheet and flatten slightly with a fork.
Bake for 12-15 minutes in the preheated oven. Cookies should look dry on top. Allow to cool for a few minutes on the baking sheet before transferring to a wire rack to cool completely.

Makes about 5 dozen cookies.

Wednesday, September 2, 2009

Lunchboxes Filled with Love


I know the Staples commercial with the Dad dancing gleefully down the aisle of a Staple’s store tossing back to school supplies into a shopping cart would lead one to believe that most parents cannot wait for their kids to go back to school, but you know what? I’m not all that gleeful about it.

I really miss my kids when they go back. And now as they are getting older they are often seldom home because of assorted activities, friend gatherings and now my oldest has a job. So truthfully I really kind of like summer when they are around just a little bit more. But like it or not it is time to send them back to school. Two of my kids have already started and one starts next week.

When I was a kid my mother made bologna and American cheese sandwiches on soft white bread on Sunday nights. Helping her, I would usually slice the bologna into quarters so it could be arranged on the bread in a square (I hated cold cut overhang-is that obsessive compulsive?) She tucked the sandwiches in plastic bags and tossed them in the freezer and each morning, assembly line style, we would grab our sandwich, an apple and a small package of pretzels (sometimes we got cookies) then toss it all in a brown paper bag (I tossed it in my Brady Bunch Lunchbox in the early years).
I don’t quite have the assembly line system my mom had and truthfully my kids do not always like to take their lunch…and certainly only my youngest has a lunchbox (albeit a Vera Bradley one which really looks more like a purse). But lunch usually is not too much different than what I got: a sandwich-but now it is turkey and American cheese on wheat, an apple, pretzels and the occasional treat. Today I have made two treats which I will likely slip into plastic bags and freeze for lunches. Whether I toss these treats into a lunchbox or simply serve them up after school, hopefully my kids will get the message that in school or out of school I love them.

Maple Almond Cinnamon Chip Banana Bars

2 1/4 cups all purpose flour
2 teaspoons baking powder
1/2 teaspoon salt
3/4 cup butter
1/2 cup sugar
1/4 cup brown sugar, light, firmly packed
1/4 cup maple syrup
2 medium bananas, peeled and mashed
1 egg
1/2 cup sliced almonds
1/2 cup Cinnamon chips

Preheat an oven to 350 degrees. Line a rimmed 15 ½ x10 ½ inch baking pan with parchment paper.

In a large mixing bowl whisk together the flour baking powder and salt. In another large mixing bowl beat together the butter and sugars with an electric mixer until light and fluffy, about 3 minutes. Add the maple syrup, bananas and the egg, beating until combined. Add the flour mixture a little bit at a time, beating after each addition until combined. Stir in the almonds and cinnamon chips.

Spread the batter evenly over the prepared pan, don’t worry if it’s not perfect just spread it as evenly as possible.
Bake 15-20 minutes or until golden brown. Cool completely before frosting or cutting into squares. Store bars in a covered container.
Note: bars are very thin...if you would prefer slightly thicker bars, bake them in a 13x9 inch pan.

Brown Sugar Cream Cheese Frosting (optional)

1(8 ounce) package of reduced fat cream cheese
1/3 cup brown sugar
1 teaspoon maple syrup

Combine all ingredients in a mixing bowl and beat until smooth.

Crispy Peanut Butter Lunchbox Bars

1 cup creamy peanut butter
1 cup marshmallow topping
4 tablespoons butter
3 cups puffed rice cereal
4 ounces dark chocolate

Lightly spray an 8x8 square dish with cooking spray.

In a large saucepan melt the butter, marshmallow topping and butter, stirring to combine.

Stir in the puffed rice cereal. Press the mixture into the prepared dish. Let cool completely before cutting into squares.

Melt the chocolate in a glass bowl placed over a pot of simmering water. Using a knife, drizzle the chocolate over the squares. Let the chocolate firm before eating (unless you really can't wait).

Monday, July 20, 2009

What can I bake with surplus M&M's?

I love it when a new movie comes out and candy companies like M&M/Mars roll out collector edition versions of their candies. While I am a big movie goer (and proud to say a charter member of Netflix) I am not what you would call a collector of movie paraphernalia so it’s not for that reason that I get excited; but rather it is because 9 times out of 10 a few weeks down the road when the movie is but a distant memory and the American consumer has moved on to the next big thing the collector packages go on clearance.

Such is the case with my recent purchase of M&M’s Transformer’s Revenge of the Fallen (was that really a movie? No one in my house cared) I was able to nab a few bargain bags of half priced Transformer M&M’s!

While I easily could have inhaled each bag, (I am in fact an M&M addict-plain not peanut…sometimes almond…never dark and certainly never those over-priced M&M premium flavors.) I showed constraint and decided to look for some recipes that used M&M’s. (Yeah that’s it"…kids don’t eat them, Mom bought them to bake with.")

As luck would have it my cooking contest/blogger friend Anna from Cookie Madness had a yummy (easy) recipe on her blog for Chocolate Chip Pretzel Bars so I gave them a go. I made one slight alteration-I replaced half of the semi-sweet chocolate chips with butterscotch chips (I sure do love those butterscotch chips). Not surprisingly the bars were loved by all. My daughter thought that they would make a delicious base for an ice cream sundae while they were still warm…unfortunately we only had mango sorbet in the fridge…ahhh..next time. OK so that takes up about 1/2 cup of M&M’s any suggestions on things to make with remaining? (I bought 3 bags...c'mon...they were on sale!!)

Chocolate Chip Pretzel Bars
by Anna at Cookie Madness (from Food & Wine)
1 cup all purpose unbleached flour (135 grams)
1/2 teaspoon baking soda (2 ml)
1/4 teaspoon salt (1 ml)
6 tablespoons unsalted butter (85 grams)
1/2 cup light brown sugar (110 grams)
1/4 cup granulated sugar (48 grams)
1 teaspoon vanilla (5 ml)
1 large egg
3/4 cups pretzels, broken
1 cup semi- sweet chocolate chips
1/3 cup M&Ms (plain) – more if you want

Preheat oven to 350 degrees F. Line an 8 inch metal pan with foil and spray with cooking spray (or use parchment).

Mix together the flour, soda and salt; set aside.

Beat the butter and both sugars in a mixing bowl. When light, beat in the vanilla. Add the egg and beat until it’s mixed, then gradually stir in the flour mixture, followed by the pretzel pieces, chocolate and M&Ms.
(I don't normally like to eat cookie dough because my mom warned me about the raw eggs and all, but this m&m studded dough was pretty darn tempting)
Spread mixture evenly in pan and bake on center rack for about 25 minutes or until golden brown. Let cool completely. Lift from pan and cut into bars.

Thursday, May 28, 2009

Really Outrageous Brownies

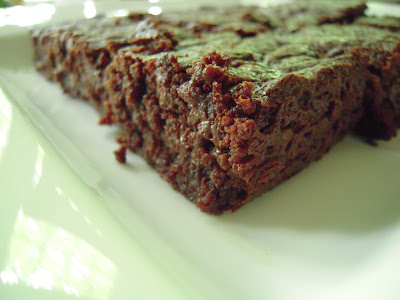
Never has a recipe, IMHO, had a more fitting title...this week's Barefoot Blogger recipe is Ina Garten's "Outrageous Brownies". And friends let me tell you...outrageous they indeed are.

In my busy little corner of the world I am frequently able to convince myself that a boxed brownie mix delivers a "homemade", melt in your mouth chocolaty treat. That is until I make the effort to prepare a "from scratch" version and then I know I'm simply fooling myself...a boxed mix just can't compare to the results that a recipe like this gives you...fudgy, rich and really melt in your mouth chocolaty-ness.
I made only one slight alteration to the recipe and that was to use half semi-sweet chocolate chips and half bittersweet (60% Cacao) chips. The bittersweet chips give an extra richness. The hardest part about this recipe, which the Food Network classified as difficult, is melting the chocolate. Chocolate can be very temperamental...I have tossed many a bowlful of seized chocolate and let me tell you as delicious as correctly melting chocolate smells, burnt chocolate is a horrendous smell! In my opinion it's not worth the risk to melt (often expensive) chocolate in the microwave-make the extra effort and melt it over a double boiler or as I do in a bowl over a pot of simmering water.

Stonewall Kitchen sells the boxed version of this recipe I would love to hear if anyone has ever tried both the boxed version and the homemade version...do they compare? Ina's recipe below says that it makes 20 large brownies, I usually cut them a great deal smaller for about 48 brownies.

FYI the Barefoot Bloggers are a group of bloggers devoted to preparing 2 of Ina Garten's (aka The Barefoot Contessa) recipes each month.

Outrageous Brownies
Copyright (c) 1999 by Ina Garten
Makes 20 Large Brownies “Inspiration for this recipe came from the Chocolate Glob in the SoHo Charcuterie Cookbook published by William Morrow in 1982. In its heyday, the SoHo Charcuterie was the cutting edge of New York restaurants. The giant confection was a blob of chocolate dough filled with chocolate chips and nuts. I though I could make a brownie with almost the same formula. They’ve been flying out the door for fifteen years!”
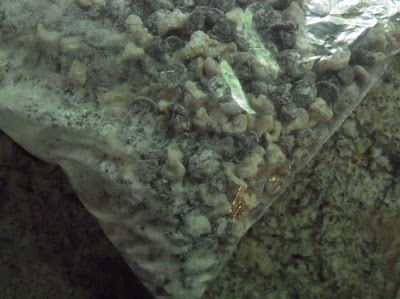
-Ina Garten

1 pound unsalted butter
1 pound plus 12 ounces semisweet chocolate chips
6 ounces unsweetened chocolate
6 extra-large eggs
3 tablespoons instant coffee granules
2 tablespoons pure vanilla extract
2 1/4 cups sugar
1 1/4 cups all-purpose flour
1 tablespoon baking powder
1 teaspoon salt
3 cups chopped walnuts

Preheat the oven to 350 degrees F. Butter and flour a 12 x 18 x 1-inch baking sheet.

Melt together the butter, 1 pound of the chocolate chips, and the unsweetened chocolate in a medium bowl over simmering water. Allow to cool slightly. In a large bowl, stir (do not beat) together the eggs, coffee granules, vanilla, and sugar. Stir the warm chocolate mixture into the egg mixture and allow to cool to room temperature.

In a medium bowl, sift together 1 cup of flour, the baking powder, and salt. Add to the cooled chocolate mixture. Toss the walnuts and 12 ounces of chocolate chips in a medium bowl with 1/4 cup flour, then add them to the chocolate batter. Pour onto the baking sheet.

Bake for 20 minutes, then rap the baking sheet against the oven self to force the air to escape from between the pan and the brownie dough. Bake for about 15 minutes, until a toothpick comes out clean. Do not over bake! Allow to cool thoroughly, refrigerate, and cut into 20 large squares.
Notes: Flouring the chips and walnuts keeps them for sinking to the bottom. It is very important to allow the batter to cool well before adding the chocolate chips, or the chips will melt and ruin the brownies. This recipe can be baked up to a week in advance, wrapped in plastic, and refrigerated.
Thursday, May 7, 2009

Butterscotch Glazed Chocolate Chip Banana Bread

I have this bad habit of every few weeks deciding that I am going to commit to eating cereal and a banana every day for breakfast. I stock up on Total, bananas and good intentions. Sadly the good intentions only last about two days and then I go back to eating my usual combination of granola bars and fruit smoothies.

This "habit" doesn't seem so bad on the surface, but what ends up happening is I'm left with a slowly blackening bunch of bananas which more often than not ends up in the trash. My kids are not the biggest fans of bananas so they don't usually eat them...but I really, really hate to throw away food so the solution became obvious: banana bread. Now every few weeks I have a bowl or two of cereal with a sliced banana followed up later in the week with a tasty banana bread-maybe it's a pretty good habit after all.

It's teacher appreciation week and I volunteered to bake something for our high school teacher breakfast--so this week they are the recipients of my blackened bananas (that doesn't sound like a very nice gift). I feel very fortunate to live in a town with some incredible teachers and my little banana bread is just a small thank you for their big job that they do so well...thank you teachers (everywhere).

So I finished typing this post and grab my camera to upload my photos and guess what?? I never put the memory card in!! There should be a bell that goes off or a warning screen that comes up for careless photographers such as myself. Well trust me when I tell you it looked really pretty!

Butterscotch Glazed Chocolate Chip Banana Bread

1 1/2 cups all purpose flour
3/4 teaspoon salt
1/2 teaspoon baking soda
1/2 teaspoon baking powder
5 tablespoons butter, room temperature
1/2 cup sugar
1/4 cup brown sugar
2 large eggs
2 medium very ripe bananas
1/4 cup mini chocolate chips

Preheat oven to 350 degrees. Grease the bottom and sides an 8x4x2 1/2 inch loaf pan.

In a medium sized bowl sift together the flour, salt, baking soda and baking powder.

In a large mixing bowl beat the butter and sugars, using an electric mixer, until light and fluffy. Add the eggs one at a time beating just until incorporated. Add the bananas and beat until combined; stir in the chocolate chips. Scrape the batter into the prepared pan.

Bake bread in the 350 degree oven for 45-50 minutes or until a toothpick or cake tester inserted in the center comes out clean. Cool in the pan for 15 minutes. Gently remove from the pan and cool completely on a wire rack. When completely cooled top with the butterscotch glaze (recipe follows).

Butterscotch Glaze:

2 tablespoons butter
1/4 cup brown sugar
2 tablespoons water
1 cup sifted confectioner's sugar
1 tablespoon heavy cream

Bring the butter, sugar and water to a boil in a small saucepan over medium heat; boil for 1 minute. Whisk in the confectioner's sugar and the heavy cream. Spoon the glaze over the cooled bread.

Friday, February 13, 2009

My Cherry Amore

Favorite Food Find Friday on the day before Valentine's Day of course must include a sweet treat and I promise you that this find will not disappoint.

Today's favorite food find is....

Hershey's Cherry Cordial Kisses!

I would like to plant a wet one on the food scientist at Hershey's who came up with the idea of soft-centered, filled kisses...they are confectionery genius in a foil wrapper. By far my favorite of these creamy filled delights is the Cherry Cordial variety; they are rich milk chocolate with a pink, creamy cherry flavored center.

I love putting these kisses in the freezer...it slows down my eating pace and provides a mini, cool ice cream-like treat. Frozen or right out of the bag, the caramel variety comes in a close second to the cherry flavored and today I saw a cheesecake variety but I exhibited a rare moment of self control and did not purchase them (can you hear the regret?).

While these treats are wonderful on their own, I've used them today to create rich, cherry flavored fudge truffles sure to please all your little sweethearts and your special someone.


Cherry Cordial Fudge Truffles

1 can sweetened condensed milk
4 tablespoons butter
1 (10 ounce) package Hershey's Cherry Cordial Kisses (wrappers removed!)
1 cup semi-sweet chocolate chips
1/2 cup unsweetened cocoa powder


(Try to resist stealing kisses as you unwrap them...just remember you can lick the pan!)

Line a 9 inch square baking dish with aluminum foil.


Pour the sweetened condensed milk into a large pan, add the butter and cook over medium heat, stirring, until the butter is melted.
Stir in the Kisses and the chocolate chips, cooking and stirring just until melted.
Pour the chocolate mixture into the square pan and refrigerate for at least 2 hours.

Pour the cocoa powder into a shallow dish. Using a spoon, scoop the fudge into rounded teaspoons and drop into the cocoa powder.
Roll the fudge into cocoa covered balls using your hands. Place into mini baking cups.
Yield: about 48 truffles

I was lucky enough to stumble upon these Reynolds heart shaped foil pans at the dollar store (I'm pretty sure they're discontinued). Three truffles fit perfectly into the hearts and I was able to package them up for the ladies at the shelter I cook for...don't they look cute?!!

Friday, January 30, 2009

Mini Brownie Bites

The Superbowl isn't just about appetizers your party needs a sweet ending. Today-Favorite Food Find Friday-is not really about a food exactly it's about something that you use to cook food. Today's favorite find is.....

Wilton's new Bite-Sized Brownie Squares-an awesome silicone baking pan that creates perfectly uniform bite sized brownies!
Embarrassingly this is my first time using a silicone baking pan; I was for some reason immediately drawn to it in the store and It was pretty good. I baked the brownies, cooled them and then easily popped out my bites! No messy brownie slicing required and a perfectly uniform result.
I followed a recipe that I found on All Recipes by Eagle Condensed Milk and while the result is tasty it was a bit labor intensive. The original recipe was for brownie bites-made by using a melon baller to shape bite-sized brownies (which I also made). The instructions called for "dipping" the brownies into the melted chocolate, but I really found it difficult to "dip" the chocolate-it was rather thick-so I just spread it on with a small spatula. I then decorated the bites with a butter cream frosting. While they look OK, I have learned that cake decorating is not my thing.
I'm hoping to score a field goal at least with these tasty hand held treats!

Mini Elegant Brownie Bars
adapted from All Recipes

1 (19.8 ounce) package brownie mix
1 (14 ounce) can sweetened condensed milk
8 ounces semi-sweet chocolate
1 teaspoon butter
1 teaspoon vanilla
Butter cream:
1/4 cup shortening
1/4 cup butter, softened
2 cups powdered sugar
1/2 teaspoon vanilla extract
1-2 tablespoons milk

Preheat oven to 350 degrees. Lightly spray brownie square pan and an additional small baking pan with cooking spray. Prepare the brownie mix as directed on the box. Spoon a tablespoonful into each brownie square section in the pan. Pour any additional batter into the additional small pan. Bake in the oven for 20-25 minutes or until a cake tester inserted in the center of each brownie square comes out clean. Allow brownies to cool before popping out of brownie square pan.

For the brownies cooked in the extra small pan, use a melon baller and scoop the brownies into small rounds.
In a medium saucepan heat the sweetened condensed milk over medium heat. Add the chocolate and stir until melted. Stir in the butter and vanilla. Keeping the chocolate warm, dip the brownies into the chocolate to coat or spread the chocolate on with a small spatula.
Place brownies on a wire rack to dry. When chocolate is set, decorate with the butter cream.

In a mixing bowl with an electric mixer, beat together the shortening and the butter until smooth and fluffy. Add the powdered sugar 1/2 cup at a time, beating after each addition. Stir in the vanilla and the milk. Transfer butter cream to a decorating bag with desired decorating tip and pipe frosting onto brownies.

Friday, December 19, 2008

Favorite Food Finds Friday

All week long I have been baking and shopping, baking and shopping. (Did you notice I didn't say posting?) One day was even devoted to a group bake where a few friends and I got together and made multiple batches of three different cookies: Pecan Tassies, those "pretzel/kiss/mm things and a favorite of mine...The Barefoot Contessa's JamThumbprints. When I came home I was still in a baking mood so I baked my very favorite holiday cookie which I will share with you soon: Cherry Macaroon Puffs-they are very special cookies to me...

Baking with friends really made it less like work and more like an event. My friend Sue made everyone delicious paninis with her griddler and we enjoyed an afternoon of baking together and since it was at her house I didn't have a messy kitchen to clean up!! (Thanks, Susie!).

Ok I'll get to my favorite food find....it has to do with baking-sort of. I love to make fudge for gifts around the holidays and this year I used a favorite food find to create a tasty variation of the fudge recipe from the side of the Fluff tub. (Fluff isn't the Friday favorite but it does count as a favorite food find though...who doesn't love that sticky, sweet, velvety white treat??)

This week I love.....McCormick Gourmet Collection Chai Spice Blend! I replaced the semi-sweet chocolate chips with white chips and stirred in a teaspoon of the spice mixture to create what I am calling Chai Latte Fudge. Once the fudge is firm and you've cut it into squares, you can either serve it as is or for an extra pretty touch you can sift unsweetened cocoa powder over the squares. It's a melt in your mouth treat-perfect for teachers gifts or for your neighbors.

Chai Latte Fudge

5 cups sugar
1 1/4 cups evaporated milk
1/4 pound butter (1 stick), cut into tablespoons
1 (16 ounce) container Marshmallow Fluff
1 teaspoon salt
1 1/2 teaspoon vanilla extract
2 (12 ounce) packages white baking chips
1 teaspoon Chai Spice Blend
Line a 13x9 inch pan with aluminum foil leaving the edges of the foil hanging out of the pan. Lightly spray the foil with cooking spray.


Combine the sugar, evaporated milk, butter, Fluff, salt and salt in a large sauce pan. Stir over low heat until blended.

Bring mixture to a boil over medium heat, stirring. Being careful not to mistake escaping air bubbles for boiling. Then boil slowly, stirring constantly, for 5 minutes.


Remove from the heat. Stir in the vanilla, baking chips an the Chai Spice Blend. Pour into the prepared pan. Allow to cool at room temperature.

Yields: about 5 pounds of fudge

Store the fudge covered at room temperature. I don't like my fudge chilled...but hey, that's just me.

Wednesday, December 10, 2008

Snow-Capped Coconut Fudge Bites

Cookie number two!!

Next up is a rich chocolaty coconut treat! These bite-sized brownie like treats couldn't be any simpler to make and they are a favorite of mine-I love anything chocolate and coconut.

There are a few things you need to keep in mind during cookie week:

These are cookies, not diet food...so yes they're full of sugar and butter! (Everything in moderation, right?)
When you are storing your cookies, wrap each cookie separately otherwise they all start to taste the same.
If you are planning on freezing cookies that are coated with powdered sugar, plan on sprinkling a little extra after thawing.

Snow-Capped Coconut Fudge Bites
1 cup butter, softened
1 (11.5 ounce) package Bittersweet (not unsweetened) chocolate
1 cup sugar
1/3 cup heavy cream
1 teaspoon coconut extract (you may substitute vanilla extract)
3 large eggs
1 cup flour
1 cup shredded coconut
1/4 cup powdered sugar

Melt the butter and chocolate in a medium sized saucepan over medium heat, stirring frequently; cool completely.

Using a large spoon, stir in the sugar, heavy cream and coconut extract; stir until well combined. Add the eggs one at a time, stirring after each until incorporated. Gradually stir in the flour and the coconut.

Preheat oven to 350 degrees. Spray a mini muffin pan lightly with cooking spray. Spoon the batter into the cups filling each 2/3 full. Bake in the oven 14-16 minutes or until a toothpick inserted in the center comes out clean.

Gently remove bites from the pan and transfer to wire racks to cool completely.

Makes about 48 bites.

Note: Let the cakes cool for 5 minutes in the pan before gently removing bites and transferring to the wire rack to cool completely. Use a small spatula or knife to remove the bites being careful to not not break them. The "cookies" will be slightly crisp on the outside and tender on the inside.