; Supermarket Serenade: Barefoot Bloggers
Showing posts with label Barefoot Bloggers. Show all posts

Thursday, August 13, 2009

Barefoot Bloggers...Mango Banana Daiquiris

Today is Barefoot Thursday! That day when food bloggers near and far all prepare a delicious recipe created by the beloved Barefoot Contessa herself, Ina Garten. Why don't you join us?

Not sure if anyone noticed but in bit of overzealous excitement (it was my turn to choose) I posted this last Thursday. Then I surfed around fellow barefoot bloggers blogs and noticed not a single one posted. Why? Because I was a week early!! Ooops! This week's recipe is for Mango Banana Daiquiris and they were just the island treat I needed. I am a mango freak...I love them! I could eat them breakfast lunch and dinner and now I can drink them in between.

When I selected this week's recipe (yes! it was my turn to choose) I knew that I would just be getting back from our Caribbean cruise and I just knew I would need a little something to bring me back to the islands if only for just a few moments! It was unfortunate that my drink was not served to me as I lounged on my deck chair by the pool or that I didn't have fabulous Daiquiri glasses to serve them in, but they were nevertheless delicious. I prepared one batch with the rum for the adults and one batch sans liquor for the kiddies. I have to say I would love to drink one of these every morning (without the rum of course!).


Here's a few super tips on selecting mangoes from your supermarket:

Look for mangoes with multiple colors-reds, yellows and a touch of green on
them.
Mangoes should give slightly when you press on them...not too much
though as you don't want them to be mushy.
Avoid mangoes with blemished skin, try to find smooth, undented fruit.

Mango Banana Daiquiris

By Ina Garten


2 cups chopped ripe mango (1-2 mangos, peeled and seeded)
1 ripe banana, chopped
1/2 cup freshly squeezed lime juice (4 limes)
1/4 cup sugar syrup*
1 1/4 cups dark rum
Mango slices for serving


Place the mango, banana, lime juice, sugar syrup and rum in a blender and process until smooth. Add 2 cups of ice and process again until smooth and thick. Serve ice cold in high ball glasses with mango slices.


*to make simple syrup, heat 1 cup of sugar and 1 cup of water in a small saucepan until the sugar dissolves. Chill.

Here's a little St. Thomas shot...ahhhhh...I need to go back...

Thursday, July 23, 2009

Peach & Blueberry (or Raspberry) Crumbles

Do you ever have one of those days when you just get something in your head and that's just it-it's stuck there? I had one of those days today.

Before I left for the supermarket I looked over the recipe for today's Barefoot Blogger recipe not once but twice just to be sure. But for some reason once I got to the store I just had it in my head that we were making Peach and Raspberry Crumbles. It didn't matter that my list said blueberries...I knew it was raspberries...I knew I simply wrote blueberries by mistake. Guess what? The list was right.
As I am sure you may have surmised today is Barefoot Thursday, the day when countless food bloggers across the blogosphere prepare a delicious recipe created by the infamous Ina Garten-a.k.a. The Barefoot Contessa. Today's recipe was selected by Aggie of Aggie's Kitchen-she selected (as you already know) Peach and Blueberry Crumbles. Why don't you join us next month preparing a Barefoot Blogger recipe?

I made only one change and that obviously would be that I used raspberries instead of the called for blueberries. But I have to say...raspberries worked out just grand. Not to sound like sour grapes (or blueberries as the case may be) but I like raspberries better anyway.

The recipe was delicious...peaches are so tasty right now so it could not have been a more timely selection-Thanks, Aggie.

Peach & Blueberry Crumbles
Ina Garten from The Barefoot Contessa at Home

For the fruit:
2 pounds firm, ripe peaches (6-8 peaches)
2 teaspoons grated lemon zest
2 tablespoons freshly squeezed lemon juice
1/2 cup granulated sugar
1/4 cup all-purpose flour
1 cup fresh blueberries (1/2 pint)...or you may use raspberries!
For the crumble:
1 cup all-purpose flour
1/3 cup granulated sugar, lightly packed
1/2 teaspoon kosher salt
1/4 teaspoon ground cinnamon
1/4 pound (1 stick) cold unsalted butter, diced

Preheat the oven to 350 degrees.

Immerse the peaches in boiling water for 30 seconds to 1 minute, until their skins peel off easily. Place them immediately in cold water. Peel the peaches, slice them into thick wedges and place them in a large bowl. Add the lemon zest, lemon juice, granulated sugar, and flour. Toss well. Gently mix in the blueberries. allow the mixture to sit for 5 minutes. spoon the mixture into ramekins or custard cups.
or the topping, combine the flour, granulated sugar, brown sugar, salt cinnamon, and the butter in the bowl of an electric mixer fitted with a paddle attachment. Mix on low speed until the butter is the size of peas. Rub the mixture with your fingertips until it's in big crumbles, then sprinkle evenly over the fruit. Place the ramekins on a sheet pan lined with parchment paper and bake for 40-45 minutes, until the tops are browned and crisp and the juices are bubbly. serve warm or at room temperature.

If you want to make these early, store the unbaked crumbles in the refrigerator and bake before dinner.

Thursday, July 9, 2009

Barefoot Pasta with Sun-Dried Tomatoes

Oh boy...this one is a keeper.

Today is Barefoot Thursday (barely...I'm squeaking it in at the last possible moment-I can't even use Pacific time as a cover-I'm east coast and it's pushing 11:00 p.m.) and as with all Barefoot Thursdays, (Barefoot) food bloggers near and far prepare a delicious Ina Garten (aka: The Barefoot Contessa) recipe.

Today's recipe selection was made by Cat of Delta Whiskey. Cat, whose birthday just happens to be today (Happy Birthday!!); she selected Pasta with Sun-dried Tomatoes. This recipe was divinely easy and divinely tasty.

I prepared this recipe for the Women's shelter that I cook for so I had to do a little doubling and tripling here and there. Ina Garten's original recipe is here. I'm sharing the recipe as I adapted it for 20. (Oh and I forgot to buy the olives...so it's sans black olives...sorry!)

Pasta with Sun-Dried Tomatoes for 20
adapted from Ina Garten from Barefoot Contessa Family Style

1 1/2 pounds pasta (I used mini-penne)
kosher salt
Olive oil
3 pints grape tomatoes, quartered
2 pounds fresh mozzarella, medium diced
18 sun dried tomatoes in oil, drained and chopped
for the dressing:
10 sun-dried tomatoes in oil, drained
4 tablespoons red wine vinegar
1/2 cup good olive oil
2 garlic cloves, diced
2 teaspoons capers
3 teaspoons kosher salt (I know, I know that's a lot...but it really tastes good)
1 teaspoon freshly ground black pepper
1 cup freshly grated Parmesan
1 1/2 cups packed basil leaves, julienned

Directions:
Cook the pasta in two batches 3/4 lb. at a time in a large pot of boiling salted water. Boil for 12 minutes or according to the directions on the package. Drain well, toss with a bit of olive oil to keep it from sticking and allow to cool. Place the pasta in a large bowl and add the tomatoes, mozzarella, and chopped sun-dried tomatoes.

For the dressing, combine the sun dried tomatoes, vinegar, olive oil, garlic capers, salt and pepper in a food processor until almost smooth.

Pour the dressing over the pasta, sprinkle with Parmesan and basil and toss well.

Monday, July 6, 2009

Gazpacho and Avocado-lime Chicken Pitas

Well I had every good intention of posting my Barefoot Blogger's Gazpacho before I left to go away, but you know how it goes...I mean I had to pack for everyone! So here it is now and as an added bonus I've included the recipe for a tasty little pita sandwich that I served with it.

The Gazpacho, the second of the June recipes for the Barefoot Bloggers was selected byMeryl of My Bit of Earth. Barefoot Bloggers are a group of bloggers that prepare two Ina Garten (aka: The Barefoot Contessa) recipes each month (unless you go away and then have to prepare 3 Ina Garten recipes in one month!).

So yeah, Gazpacho...cold tomato soup...hmmm. Well, because it was an Ina Garten recipe the flavors were really delicious, but I've got to tell you I'm not much for the cold soup thing. Hot, steamy July day withstanding, I'd still rather have my soup hot (which truthfully I did! I warmed up my little bowl in the microwave and served it just warm...and you know what...it was great!) The recipe for Ina's Gazpacho is here.
On the side I served a tasty little pita stuffed with chicken, broccoli slaw, avocado and tomato...it was the perfect accompaniment. Broccoli slaw is a delicious (and healthful) convenience I found in the produce aisle of the supermarket. It is a combination of shredded broccoli, cabbage and carrots all conveniently packaged and ready to eat.

I have long been a broccoli hater that has really wanted to be a broccoli at least liker, but I just haven't been able to stomach it. I know how good broccoli is for you and I really, really want to like it and this has made it almost possible! I love this stuff...it is fabulous tucked in a sandwich for a delicious, healthful crunch. I also love to quickly blanch it, season lightly with salt and pepper then serve it with grilled meats...simple and delicious!


Avocado-lime Chicken Pitas
1 avocado, seed removed, diced
8 grape tomatoes, very thinly sliced
1 cup broccoli slaw
1 cup small diced cooked chicken (such as leftover grilled or store-bought rotisserie)
4 basil leaves, very finely chopped
1 teaspoon lime juice
2 teaspoons red pepper flavored olive oil
3/4 teaspoon kosher salt
1/2 teaspoon freshly ground black pepper
4 small whole wheat pitas, split open

In a large bowl, combine the diced avocado, tomatoes, broccoli slaw, chicken, basil, lime juice, oil, kosher salt and pepper; stir gently to combine well.

Using a small spoon, stuff the pitas with the filling, evenly dividing.
Yield: 4 pita sandwiches

Thursday, June 11, 2009

Curried Couscous


It's Barefoot Thursday!
Barefoot Bloggers are a group of bloggers that twice a month prepare a (almost always) delicious recipe from the Barefoot Contessa Ina Garten. This weeks recipe was selected by Ellyn of Recipe Collector and Tester . She chose Curried Couscous from the Barefoot Contessa cookbook.

Well I'm going to be totally up front with you...I did not want to like this recipe. I have long turned my nose up at all things "curried"-and honestly only because of the smell; I just can't stand the smell of curry. But I made the recipe thinking Ina has never steered me wrong and why would I let my aberrant fear of curry stand in the way of a potentially delicious dinner?

Well..she did it again-it was a fabulous recipe. I made one omission and one addition (and one little tweak-for personal taste). The omission was the raisins/currants. I only like raisins if they are covered in chocolate and since I did not think that chocolate would be a good addition omission seemed the only option-my kids were grateful for that. (And speaking of my kids, they don't really care for nuts so while I did add the almonds to the final dish I photographed the dish before stirring them in!)

The addition was to take an entire rotisserie chicken, dice and toss in...it was delicious and made it a meal.

And now for the tweak...I am almost embarrassed about the tweak. In my heart I knew that Ina would know just the right amount of each ingredient, but when it came to adding in the curry my olfactory receptors seemed to take over and make me decrease the curry to 1/2 teaspoon...it was curried enough.

Curried Couscous
Copyright, 1999, The Barefoot Contessa Cookbook

1 1/2 cups couscous
1 tablespoon unsalted butter
1 1/2 cups boiling water
1/4 cup plain yogurt
1/4 cup good olive oil
1 teaspoon white wine vinegar
1 teaspoon curry powder
1/4 teaspoon ground turmeric
1 1/2 teaspoons kosher salt
1 teaspoon freshly ground black pepper
1/2 cup small-diced carrots
1/2 cup minced fresh flat-leaf parsley
1/2 cup dried currants or raisins
1/4 cup blanched sliced almonds
2 scallions, thinly sliced (white and green parts)
1/4 cup small-diced red onion

Directions:
Place the couscous in a medium bowl. Melt the butter in the boiling water and pour over the couscous to soak for 5 minutes. Fluff with a fork.

Whisk together the yogurt, olive oil, vinegar, curry, turmeric, salt, and pepper. Pour over the fluffed couscous, and mix well with a fork. Add the carrots, parsley, currants, almonds, scallions, and the red onions, mix well and season to taste. Serve at room temperature.
(Sorry about this photo...it's been dark and rainy around here the last few days and so hard to get a bright shot!:))

Thursday, May 28, 2009

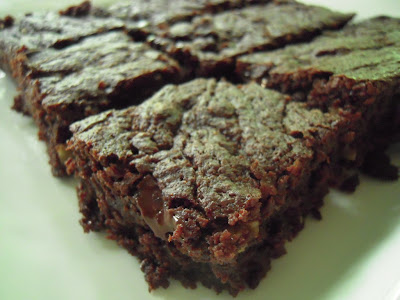
Really Outrageous Brownies

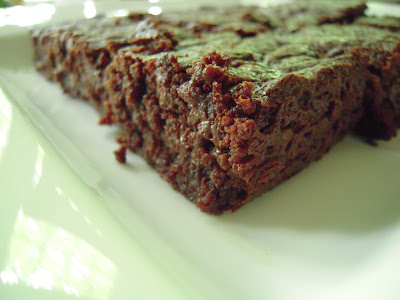
Never has a recipe, IMHO, had a more fitting title...this week's Barefoot Blogger recipe is Ina Garten's "Outrageous Brownies". And friends let me tell you...outrageous they indeed are.

In my busy little corner of the world I am frequently able to convince myself that a boxed brownie mix delivers a "homemade", melt in your mouth chocolaty treat. That is until I make the effort to prepare a "from scratch" version and then I know I'm simply fooling myself...a boxed mix just can't compare to the results that a recipe like this gives you...fudgy, rich and really melt in your mouth chocolaty-ness.
I made only one slight alteration to the recipe and that was to use half semi-sweet chocolate chips and half bittersweet (60% Cacao) chips. The bittersweet chips give an extra richness. The hardest part about this recipe, which the Food Network classified as difficult, is melting the chocolate. Chocolate can be very temperamental...I have tossed many a bowlful of seized chocolate and let me tell you as delicious as correctly melting chocolate smells, burnt chocolate is a horrendous smell! In my opinion it's not worth the risk to melt (often expensive) chocolate in the microwave-make the extra effort and melt it over a double boiler or as I do in a bowl over a pot of simmering water.

Stonewall Kitchen sells the boxed version of this recipe I would love to hear if anyone has ever tried both the boxed version and the homemade version...do they compare? Ina's recipe below says that it makes 20 large brownies, I usually cut them a great deal smaller for about 48 brownies.

FYI the Barefoot Bloggers are a group of bloggers devoted to preparing 2 of Ina Garten's (aka The Barefoot Contessa) recipes each month.

Outrageous Brownies
Copyright (c) 1999 by Ina Garten
Makes 20 Large Brownies “Inspiration for this recipe came from the Chocolate Glob in the SoHo Charcuterie Cookbook published by William Morrow in 1982. In its heyday, the SoHo Charcuterie was the cutting edge of New York restaurants. The giant confection was a blob of chocolate dough filled with chocolate chips and nuts. I though I could make a brownie with almost the same formula. They’ve been flying out the door for fifteen years!”
-Ina Garten

1 pound unsalted butter
1 pound plus 12 ounces semisweet chocolate chips
6 ounces unsweetened chocolate
6 extra-large eggs
3 tablespoons instant coffee granules
2 tablespoons pure vanilla extract
2 1/4 cups sugar
1 1/4 cups all-purpose flour
1 tablespoon baking powder
1 teaspoon salt
3 cups chopped walnuts

Preheat the oven to 350 degrees F. Butter and flour a 12 x 18 x 1-inch baking sheet.

Melt together the butter, 1 pound of the chocolate chips, and the unsweetened chocolate in a medium bowl over simmering water. Allow to cool slightly. In a large bowl, stir (do not beat) together the eggs, coffee granules, vanilla, and sugar. Stir the warm chocolate mixture into the egg mixture and allow to cool to room temperature.

In a medium bowl, sift together 1 cup of flour, the baking powder, and salt. Add to the cooled chocolate mixture. Toss the walnuts and 12 ounces of chocolate chips in a medium bowl with 1/4 cup flour, then add them to the chocolate batter. Pour onto the baking sheet.

Bake for 20 minutes, then rap the baking sheet against the oven self to force the air to escape from between the pan and the brownie dough. Bake for about 15 minutes, until a toothpick comes out clean. Do not over bake! Allow to cool thoroughly, refrigerate, and cut into 20 large squares.
Notes: Flouring the chips and walnuts keeps them for sinking to the bottom. It is very important to allow the batter to cool well before adding the chocolate chips, or the chips will melt and ruin the brownies. This recipe can be baked up to a week in advance, wrapped in plastic, and refrigerated.
Thursday, May 14, 2009

Barefoot Bloggers Wild Card

Please if you haven't yet (and are so inclined) click on the Crisco link and vote for my Caribbean Chicken with Roasted Jalapeno Mango Sauce!! $25,000 is on the line!


This week for Barefoot Bloggers an interesting feature has been introduced. (BTW for anyone who does not know, Barefoot Bloggers are a group of food bloggers that prepare a delicious recipe created by Ina Garten-The Barefoot Contessa-on two Thursdays of each month). The new feature is a wild card of sorts or as the Barefoot blogger hosts call it backtracking...we're allowed to choose an alternate Barefoot Blogger) recipe as a substitute for one of this month's selections.
I am sooooo relieved! This weeks selection was to have been Tuna Salad (selected by Kate of Warm Olives and Cool Cocktails). There are only two thing I can absolutely not eat and they are Tuna and mayonnaise. This tuna salad does not call for mayonnaise but nevertheless I am using the wild card. I decided to select a recipe that was prepared before I joined the Barefoot Bloggers group-in fact, it was the very first recipe that the group prepared: Herbed Baked Eggs from Ina Garten's Barefoot in Paris Cookbook.

The results were positively divine! What an absolutely elegant and delicious way to serve eggs. I was out of parsley so I substituted fresh sage for the parsley; I'm certain that any herb combination would be wonderful. I would love to try substituting different cheeses-I was thinking of perhaps a Cotija cheese with bits of jalapeno tossed in for a Tex-Mex version.

Herbed Baked Eggs

1/4 teaspoon minced fresh garlic
1/4 teaspoon minced fresh thyme
1/4 teaspoon minced fresh rosemary
1 tablespoon fresh parsley
1 tablespoon freshly grated Parmesan cheese
6 extra large eggs
2 tablespoons heavy cream
1 tablespoon unsalted butter
kosher salt and freshly ground black pepper
Toasted French bread or Brioche for serving

Preheat the broiler for 5 minutes and place the oven rack 6 inches below the heat.

Combine the garlic, thyme, rosemary, parsley and Parmesan cheese and set aside. Carefully crack three eggs into each of two bowls without breaking the yolks. (It's important to have all the eggs ready to go before cooking).
Place 2 individual gratin dishes on a baking sheet. Place 1 tablespoon cream and 1/2 tablespoon of butter in each dish and place under the broiler for about 3 minutes until hot and bubbly. Quickly but carefully pour 3 eggs into each gratin dish and sprinkle with the herb mixture then sprinkle liberally with salt and pepper. Place under the broiler for 5-6 minutes until the whites of the egg are almost cooked. (Rotate the baking sheet once if they aren't cooking evenly). The eggs will continue to cook once you take them out of the oven. Allow to set for 60 seconds and serve hot with toasted bread.

Friday, March 27, 2009

Barefoot Favorite Food Find

You could call me lazy, but I'm really just multitasking...this week I've combined Favorite Food Find Friday with the Barefoot Blogger challenge.

Barefoot Bloggers are a group of bloggers that twice a month prepare a (almost always) delicious recipe from the Barefoot Contessa Ina Garten. This weeks recipe was selected by Anne of Anne Strawberry. She chose Tomato and Goat Cheese Tarts from the Barefoot Contessa Back to Basics cookbook.

I had a few glitches with this week's recipe...
1. I forgot to take a picture of the completed recipe.
2. It didn't really matter because I forgot to put the memory card into the camera so I actually have NO pictures of my version! So my apologies in advance for the lack of visuals.

I would make the recipe again but I have to leave in a couple of hours...my daughter and I are going to NYC to see Billy Elliot and she is competing in an Irish Dancing competition (feis) there tomorrow...so no time.

Today's favorite food find is...

(I was able to just take a picture of the cheese because I had some leftover!) It's Andes Panquehue Cheese Chilean Pepper. Now why would this be the choice when clearly the recipe called for goat cheese? Well, I honestly do not like goat cheese and could not bear to use it so I made a substitution. Since last night was my night to host Bunco at my house I prepared the recipe as individual appetizers. I used a round cookie cutter and cut small circle in the dough and transformed the recipe into bite sized tarts with a spicy chili pepper flavor.

You can find the original recipe here. The following is my adaptation...

Spicy Tomato Cheese Tarts adapted from The Barefoot Contessa's Tomato and Goat Cheese Tarts

1 package puff pastry, defrosted

Red pepper flavored olive oil

1 cup minced shallots

1 garlic clove, minced

Kosher salt and freshly ground black pepper

3 tablespoons dry white wine

4 tablespoons freshly grated Parmesan cheese

4 ounces Andes Panquehue Chilean Pepper Cheese (or you may substitute Pepper Jack cheese), coarsely chopped

10-15 grape tomatoes, thinly sliced

3 tablespoons fresh cilantro, coarsely chopped

Unfold the puff pastry sheets on a lightly floured surface and roll it lightly to an 11x14 inch rectangle. Using a 3 inch biscuit cutter cut the dough into circles (you should be able to get about 24 circles from each sheet) Place the circles on two parchment paper lined baking sheets and chill until ready to use.

Preheat the oven to 425 degrees.

Heat 3 tablespoon of red pepper flavored olive oil in a large skillet over medium to low heat and add the shallots and garlic. Saute for 10-15 minutes, stirring frequently, until the shallots are translucent and the skillet is almost dry. Stir in 1/2 teaspoon of salt and 1/2 teaspoon of pepper along with the 3 tablespoons of white wine; cook for an additional 10 minutes or just until the onions are lightly browned.

Using a small round biscuit cutter, gently score a circle onto each pastry circle. Prick the pastry inside the smaller circle with the tines of a fork and sprinkle a bit of Parmesan on each round staying inside the scored border.

Divide the shallot mixture on each circle, again staying within the scored edge. Divide the cheese between the tarts arranging on top of the shallots. Place one or two grape tomato slices on top of the cheese in each tart. Drizzle with additional red pepper oil and sprinkle with cilantro, salt and pepper. Sprinkle additional Parmesan cheese over each.

Bake for 10-12 minutes in the preheated oven.

Makes about 48 appetizer sized tarts.


Friday, March 13, 2009

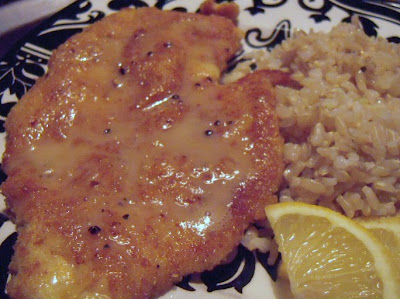
Barefoot Bloggers: Chicken Picatta

Busy week nights have left very little time for cooking anything of interest lately which is why I am ever so glad that it is once again Barefoot Thursday(and just to illustrate my disorganization of late this is posted a day late). Barefoot Thursday, for those of you who don’t know, occurs two Thursdays a month and is a day when various food bloggers prepare a recipe from one of the Barefoot Contessa’s (a.k.a. Ina Garten) cookbooks.

This week’s recipe is the perfect quick weeknight supper: Chicken Piccata selected by Lindsay of Noodle Nights and Muffin Mornings.
I actually make this recipe all the time with just one slight change...to cut a bit of the tang of the lemon I add a tablespoon of heavy cream. I served it with steamed brown rice and a salad-just perfect. The recipe I had been using in the past did not call for finishing in the oven so I tried that variation and I must say, I thought that the chicken came out a bit more juicy this way. My cutlets were thin (I bought the thin sliced ones so I didn't have to pound) so I cut the oven time to 5 minutes.

Barefoot Contessa’s Chicken Piccata · 4 boneless skinless chicken breasts
· kosher salt & freshly ground black pepper
· 1 cup flour
· 2 extra large eggs
· 1 1/2 cups seasoned dry bread crumbs
· olive oil
· 3 tablespoons unsalted butter, at room temperature
· 1/3 cup fresh lemon juice, reserve the lemon halves
· 1/2 cup dry white wine
· fresh parsley, chopped
Preheat oven to 275 and line sheet pan with parchment paper.
Place each chicken breast between 2 sheets of parchment paper and pound to 1/4 inch thick. Sprinkle both sides with salt and pepper.
Mix the flour, 1 teaspoons salt and 1/2 teaspoons pepper in shallow plate. In a second plate, beat the eggs with 1 Tbls. water. Place the breadcrumbs on a third plate.
Dip each breast first in the flour, shake off the excess and then dip in egg and then bread crumb mixture.

Heat 2 Tbls. olive oil in large saute pan over medium heat. Add 2 chicken breasts and cook for 2-3 minutes on each side until browned. Place them on lined pan and place in oven while you cook the rest of the chicken. Heat more olive oil in saute pan and cook the second 2 chicken breasts. Place them on the same lined pan and place in oven for 5-10 minutes while you make the sauce.
For the sauce, wipe out the saute pan with a dry paper towel. On medium heat, melt 1 Tbls. of the butter and then add the lemon juice, white wine, the reserved lemon halves, 1/2 teaspoons salt and 1/4 teaspoons pepper.

Boil sauce over high heat until reduced by half which will be about 2 minutes. Remove from heat and add remaining 2 Tbls. butter and swirl to combine. Discard the lemon halves. Serve one chicken breast on each plate and spoon on the sauce with a sprinkling of fresh parsley.

Wednesday, January 21, 2009

Barefoot Bloggers-Easy Sticky Buns

One of my favorite things about delicious sticky buns has always been that they are difficult and time consuming to make. Yes, you read that right. I like that they are difficult. If there is one thing I don't need it is an easy way to make something as delicious as sticky buns. For all these years my laziness has kept me safe from the high calories and fat of this decadent treat...until now.It's Barefoot Blogger Thursday-that day when bloggers across the blogosphere prepare another delicious recipe created by the talented Ina Garten (aka: The Barefoot Contessa). Why don't you join in? (It's fun!) Thank you to Melissa of Made by Melissa for her selection of this week's recipe.

Here's the concept: Instead of the normal dough needed for sticky buns which needs to rise overnight, Ina very cleverly took frozen puff pastry and transformed it into a ready in 45 minutes "sticky-bun-like" treat. I made only one change to the recipe-I did not have raisins so I substituted dried cranberries. The cranberries were a tasty substitution and next time I would add some orange zest and make them cranberry-orange sticky buns.

Here's the result: While not as tender as traditional sticky buns the buns were however sweet and delicious. A word of caution-remove the buns from the pan while they are still warm! I let some of them cool in the pan while I was taking pictures and this is what happened:

While the warm ones came out quickly and the sugary, buttery topping came out wonderful the ones that I let cool in the pan were difficult to remove and the topping hardened. Eaten warm the buns are tender, but once cooled they have the texture of almost a cookie...delicious, but not really tender and cake-like. I loved the ease of this recipe and unfortunately I know I will be making them again.

The Barefoot Contessa's Easy Sticky Buns
From Back to Basics

12 tablespoons (1 1/2 sticks) unsalted butter, at room temperature
1/3 cup light brown sugar, lightly packed
1/2 cup pecans, chopped in very large pieces
1 package (17.3 ounces/2 sheets) frozen puff pastry, defrosted
for the filling:
2 tablespoons unsalted butter, melted and cooled
2/3 cup light brown sugar, lightly packed
3 teaspoons ground cinnamon
1 cup raisins

Preheat the oven to 400 degrees. Place a 12-cup standard muffin tin on a sheet pan lined with parchment paper.

In the bowl of an electric mixer fitted with the paddle attachment, combine the 12 tablespoons butter and 1/3 cup brown sugar. Place 1 rounded tablespoon of the mixture in each of the 12 muffin cups. Distribute the pecans evenly among the 12 muffin cups on top of the butter and sugar mixture. Lightly flour a wooden board or stone surface. Unfold one sheet of puff pastry with the folds going left to right. Brush the whole sheet with half of the melted butter. Leaving a 1-inch border on the puff pastry, sprinkle each sheet with 1/3 cup of the brown sugar, 1 1/2 teaspoons of the cinnamon, and 1/2 cup of the raisins. Starting with the end nearest you, roll the pastry up snugly like a jelly roll around the filling, finishing the roll with the seam side down.

Trim the ends of the roll about 1/2 inch and discard. Slice the roll in 6 equal pieces, each about 1 1/2 inches wide. Place each piece, spiral side up, in 6 of the muffin cups. Repeat with the second sheet of puff pastry to make 12 sticky buns.

Bake for 30 minutes, until the sticky buns are golden to dark brown on top and firm to the touch. Allow to cool for 5 minutes only, invert the buns onto the parchment paper (ease the filling and pecans out onto the buns with a spoon), and cool completely.

Wednesday, January 14, 2009

Banana Sour Cream Pancakes with Spiced Walnut Butter

Is it better to be late than never?

For a few months now I have been a member of food blogging group known as the Barefoot Bloggers. The Barefoot Bloggers prepare two of Ina Garten’s (a.k.a. The Barefoot Contessa)recipes each month. And, well, I’m late. I am a week late to be exact. I suppose I could have just skipped this recipe, but quite honestly I was particularly drawn to the idea of banana pancakes and I was very curious to see how Ina’s addition of sour cream would affect the texture. So I didn’t just skip, I just came late to the party.

First a thank you to Karen of Something Sweet by Karen for selecting this recipe it was a really nice choice. It came as no surprise to me that Ina could improve upon something as tasty and simple as pancakes-her version did not disappoint

In this supermarket world of ready-to-eat pancakes and boxed complete mixes that you only need to add water to, it is so easy to get lazy and choose to not make homemade pancakes. But let’s get real- what could be easier than making pancakes? By adding a few extra steps to the simple “just add water” you can achieve “International House of Pancakes” breakfast greatness (or for the more refined among you “Elegant Bed and Breakfast” breakfast greatness). There honestly are no boxed mixes or microwavable pancakes that come out as tasty, light and fluffy as homemade pancakes and we’re only talking an extra maybe five minutes worth of effort.

I used low fat sour cream and skim milk and I still felt the texture was superb (I can only imagine how delicious full fat would be…but alas the resolution). The bananas almost melted right into the batter while cooking. For the butter, I decided to make a quick spiced walnut butter which gave a little bit of a crunch to contrast the velvety texture of these positively divine pancakes. Try, try, try if you can to use pure maple syrup, it truly makes a big difference.


Banana Sour Cream Pancakes by Ina Garten

1 1/2 cups flour
3 tablespoons sugar
2 teaspoons baking powder
1 1/2 teaspoons kosher salt
1/2 cup sour cream
3/4 cup plus 1 tablespoon milk
2 extra-large eggs
1 teaspoon pure vanilla extract
1 teaspoon grated lemon zest
Unsalted butter
2 ripe bananas, diced plus extra for serving
Pure maple syrup

Sift together the flour, sugar, baking powder, and salt. In a separate bowl, whisk together the sour cream, milk eggs, vanilla, and lemon zest. Add the wet ingredients to the dry ones mixing only until combined.

Melt 1 tablespoon of butter in a large skillet over medium-low heat until it bubbles. Ladle the pancake batter into the pan to make 3 or 4 pancakes. Distribute a rounded tablespoon of bananas on each pancake. Cook for 2 to 3 minutes until bubbles appear on top and the underside is nicely browned. Flip the pancakes and then cook for another minute until browned. Wipe out the pan with a paper towel, add more butter to the pan, and continue cooking pancakes until all the batter is used. Serve with sliced bananas, butter and maple syrup.

Spiced Walnut Butter (my recipe)

2 tablespoons butter, room temperature
1 tablespoon finely chopped toasted walnuts
1/8 teaspoon cinnamon
1/8 teaspoon cloves
1/8 teaspoon allspice
1/8 teaspoon nutmeg

In a small bowl combine all the ingredients and stir until well combined.

Thursday, November 13, 2008

Barefoot Thursday Herb Roasted Onions

Barefoot Thursday! Barefoot Thursday is the day when barefoot bloggers across the blogosphere whip up a recipe created by Ina Garten the Barefoot Contessa. Why don’t you find out more about it by visiting the Barefoot Bloggers…maybe you would even like to join in (I’ll bet you would like it).
This week's recipe was selected by Kelly from Baking with The Boys. The recipe was a simple, elegant roasted onion recipe. I only made a few minor alterations to the original recipe-I replaced the mustard with red pepper sauce (Tabasco) and added some fresh rosemary and dried thyme (I forgot to buy fresh Thyme). I served the onions with grilled sliced skirt steak and drizzled Worcestershire sauce over the steak and the onions just before serving. It was delicious!


Now a critical reader might say: "...eh, it looks like you burned the onions"

And to that I might quickly respond: "...yeah, well, I meant to do that-a crispy onion is a tasty onion thank you very much."

After finishing, I found myself wishing I had tossed the warm onions in a mixed field greens salad with a bit of goat cheese and some walnuts...I guess I'll have to make them again! The original recipe is here.

Lightly Spiced Herb Roasted Onions (adapted from Ina Garten's recipe)


2 red onions

1 yellow onion

2 tablespoons freshly squeezed lemon juice

1 teaspoon red pepper sauce (such as Tabasco)

1/2 tablespoon finely chopped fresh rosemary

pinch dried thyme

1 teaspoon minced garlic

3/4 teaspoon kosher salt

1/4 teaspoon freshly ground black pepper

1/4 cup good olive oil

Preheat oven to 400 degrees.

Remove the stem end of each onion and carefully slice off the brown part of the root end, leaving the root in tact. Peel the onions and slice into wedges. Place the wedges in a large ovenproof skillet.

Whisk together the lemon juice, Tabasco, rosemary, thyme, garlic, salt and pepper. Gradually add the oil, whisking to combine. Pour the dressing over the onions in the skillet and gently toss to coat. Place the onions in the oven and roast for 30-40 minutes. Stir the onions once during roasting.

Thursday, September 11, 2008

Barefoot Thursday! Grown Up Mac and Cheese


Welcome to Barefoot Thursday! Barefoot Thursday comes twice a month and it’s a day when food bloggers everywhere (well about 100 bloggers right now) prepare a recipe created by Ina Garten, The Barefoot Contessa. Why don’t you join in? Today’s recipe for Grown Up Mac and Cheese was selected by Heather of Randomosity and the Girl. And oh what a fine selection it was!

Why is it that all the foods I love are so high in fat and calories? I found on a website called The Culinary Review that this recipe has 1407 calories per serving! Could that be true? I didn’t skimp on the cheese and bacon that’s for sure. I actually quintupled the recipe-not for myself (although I can shovel down Mac and Cheese with the best of them). This is my week to cook for a local women’s shelter; but now that I know that I am serving them a meal of 14,070 calories (not counting salad and dessert) I feel a tad bit guilty that I didn’t buy reduced fat cheeses.

Oh well, it sure is a tasty comfort meal though. I did make one slight change to the recipe and that was to eliminate the bread crumbs (yeah I know that’s like throwing a deck chair off the Queen Mary). But wait, I replaced the crumbs with frizzled shallots…shallots I coated with flour and cooked until crispy in some of the bacon drippings! I guess we can just go ahead and round off that calorie count to 15,000. Would anyone care for dessert?

Grown Up Mac and Cheese by Ina Garten, The Barefoot Contessa


4 ounces thick-sliced bacon
Vegetable oil
Kosher salt
2 cups elbow macaroni or cavatappi
1 1/2 cups milk
2 tablespoons unsalted butter
2 tablespoons all-purpose flour
4 ounces Gruyere cheese, grated
3 ounces extra-sharp Cheddar, grated
2 ounces blue cheese, such as Roquefort, crumbled
1/4 teaspoon freshly ground black pepper
Pinch nutmeg
2 slices white sandwich bread, crusts removed
2 tablespoons freshly chopped basil leaves
Preheat the oven to 400 degrees F.

Place a baking rack on a sheet pan and arrange the bacon in 1 layer on the baking rack. Bake for 15 to 20 minutes, until the bacon is crisp. Remove the pan carefully from the oven - there will be hot grease in the pan! Transfer the bacon to a plate lined with paper towels and crumble when it is cool enough to handle.

Drizzle oil into a large pot of boiling salted water. Add the macaroni and cook according to the directions on the package, 6 to 8 minutes. Drain well.

Meanwhile, heat the milk in a small saucepan, but don't boil it. Melt the butter in a medium pot and add the flour. Cook over low heat for 2 minutes, stirring with a whisk. While whisking, add the hot milk and cook for a minute or 2 more, until thickened and smooth. Off the heat, add the Gruyere, Cheddar, blue cheese, 1 teaspoon salt, pepper, and nutmeg. Add the cooked macaroni and crumbled bacon and stir well. Pour into 2 individual size gratin dishes.

Place the bread slices in a food processor fitted with a steel blade and pulse until you have coarse crumbs. Add the basil and pulse to combine. Sprinkle the bread crumb mixture over the top of the pasta. Bake for 35 to 40 minutes, or until the sauce is bubbly and the macaroni is browned on the top.