; Supermarket Serenade: April 2008

Wednesday, April 30, 2008

Eggs-actly what I needed

Let me set the scenario for you: it's 9:00 p.m. on a Tuesday night and your feet are up on the ottoman, your pajamas are on, the TIVO controls are in your hand and you are settling in with joyful anticipation to watch your recently tivoed installment of American Idol (or fill in the blank for the show that you like watching-me, I like American Idol). Your 11 year old comes running down from her bedroom, a tear in her eye, and says:


"Mom, I forgot to tell you, I volunteered for you to bake 24 cupcakes for my English class tomorrow-you can do it right?"
Just what you need at the end of the day...but how can you say no? Well, I couldn't.

Fortunately I have a box of cake mix at the ready-thank you Betty. But unfortunately upon checking the refrigerator I realize that we are out of eggs. Fortunately I am someone that when shopping at the supermarket often picks up odd things that I am sure I will need at some point for something...such as that can of powdered buttermilk (3 months old and I haven't used it yet, but if one of the family has a hankering for buttermilk pancakes I am ready) or more importantly for today's crisis I happen to have a can of Deb El Just Whites. Sorry for the bad pun, but it's eggs-actly what I need.

I have never made anything with them, but I am grateful that they are there, saving me from a trip to the quickie mart for eggs in my jammies. Just Whites are 100% fat free all natural powdered egg whites. The side of the can says that:
"...they are the perfect alternative for cooking and baking including quiche, muffins, cake and protein shakes, etc. and is a healthy way to reduce your fat and cholesterol intake."
Not my number one priority at this moment in time, but glad to hear it. The cupcakes came out wonderful; crisis averted and I was still able to watch American Idol as I frosted them. (Thank you TIVO). All is well.

Super Moist Cupcakes with Fluffy Cream Cheese Frosting


2 tablespoons Deb El Just Whites
6 tablespoons warm water
1 box white cake mix
1 1/4 cup water
1/3 cup canola oil
1/2 cup sour cream

Preheat oven to 350 degrees. Line 2-12 cup cupcake pans with paper liners.

In a small measuring cup whisk together the Deb El Just Whites and the warm water; set aside.
Pour the cake mix into a large mixing bowl. Stir in the water, oil, Just Whites mixture and the sour cream. Beat using an electric mixer until smooth, about 2 minutes.

Fill paper liners two-thirds full with the batter; bake in the oven for 15-20 minutes.

Let the cupcakes cool completely before frosting with the Fluffy Cream Cheese Frosting (recipe follows). Decorate as desired.


Fluffy Cream Cheese Frosting
3 ounces cream cheese, room temperature
1/4 cup butter, room temperature
1/4 cup sour cream
2 3/4 cups confectioner's sugar
1/2 teaspoon vanilla extract

Place the cream cheese, butter and the sour cream in a mixing bowl and beat using an electric mixer until light and fluffy.

Add the confectioner's sugar 1/2 cup at a time, beating after each addition. Stir in the vanilla extract.


They came out eggs-ellent (sorry-I couldn't resist).

Tuesday, April 29, 2008

Avocados: the perfect food?


Avocados are quite possibly the world's most perfect food. They are compact, they are nutritious, they add color to whatever you are making and most importantly they are delicious.

I'm rather ashamed to say that I only first tasted an avocado in 2004. A recipe that I had created for a hamburger was selected for Sutter Home's Build a Better Burger Challenge that year and it included avocados. While my husband had been enjoying the burger all along with the tasty tomato-avocado topping, I would carefully pick out the avocado-it was green and mushy...I couldn't eat green and mushy. But fear that I would possibly be asked on national television (it was filmed by the Food Network) to eat my burger in its entirety made me toss caution to the wind and taste the burger-avocados and all- at home.
Let's just say that since then I've more than made up for my error in judgement. Green and mushy rules. (Now brussel sprouts, I would never try those.) So now I am forever trying to incorporate those tasty "alligator pears" into everything I make. For the record, an avocado topped burger did win that year and it was delicious-just not mine!
Here are a few tips on selecting the perfect avocado at the supermarket:

-Gently squeeze the avocado, it should yield slightly with a little pressure, but still be slightly firm. If you know that you won't be eating it for a few days buy a firmer one.

-Some varieties will turn dark green or even black when ripe, while other varieties may still be a lighter green.

-Don't buy an avocado that feels as though the skin has separated from the flesh-it's past its prime.

-Avoid skins with marks or blemishes.

-If you do buy an unripened avocado, place in a brown paper bag for a day or so and it should soften.
-Once ripe, store the avocados in the refrigerator.

Avocados go well with so many of my favorite foods, but I think the ultimate pairing for me would have to be avocado with citrus. This salad is something I like to make for lunch (I'm trying so hard to eat more salads). Sometimes I will throw a piece of salmon on the grill then squeeze a little orange juice on it and serve it on the side. My second favorite way to enjoy avocados is right out of the shell with a little coarse salt. Mmm.

Avocado Orange Salad with Citrus Garlic Toasts


2 tablespoons butter softened
1/2 teaspoon finely chopped orange zest
1 clove garlic, minced
1 1/4 teaspoon kosher salt
3/4 teaspoon freshly ground pepper
4 slices french bread, cut 1/4 inch thick
6 cups shredded Romaine lettuce
2 avocados, peeled, seeds removed, thinly sliced
2 large seedless oranges, peeled and coarsely chopped
1 shallot, very thinly sliced
4 teaspoons extra virgin olive oil

In a small bowl combine the butter, orange zest, garlic, 1/4 teaspoon of the salt and 1/4 teaspoon of the pepper; spread the butter evenly onto all sides of the French bread slices.
Heat a medium sized skillet over medium high heat. Place the buttered French bread slices in the pan and cook, turning occasionally, until lightly browned on both sides.

Divide the shredded lettuce between 4 serving plates. Scatter the oranges and avocado over the lettuce and top each salad with the shallot.
Arrange one toast standing up in each salad. Drizzle each salad with extra virgin olive oil and sprinkle with the remaining salt and pepper.

Friday, April 25, 2008

It's all about the butter

It's difficult to say specifically what makes butter so good-it just is. After all, where would a pie crust be without butter to add a little tender flakiness? Would I really love lobster as much as I do without a small bowl of sweet melted butter to dip the claws into? Would a grilled cheese sandwich be as melt in your mouth delicious without a little (actually a lot) of softened butter slathered on before grilling? I wouldn't even think about eating warm, crusty french bread without butter.

Aside from just tasting good, butter is all natural-made from fresh cream. It's a source of vitamin E and trace amounts of vitamins A, K and D. But hold on, don't start eating it right off the butter plate yet; it is also a source of saturated fat, and like all things high in fat, it's best to use good judgement and control-you know, everything in moderation. Believe it or not though, we actually all need a little bit of fat in our diets.

While shopping at our recently opened Whole Foods supermarket the other day the Kerrygold butter caught my eye. It's hard not to notice the shiny gold package next to the not nearly as exciting cardboard ones.

I've been cooking with it and buttering bread with it for the last couple of days and I have to say I really like it. The butter has a deep golden hue and a lush, smooth texture-a little smoother and a little richer tasting than the butter we usually use. It was a tad more expensive, but I think it really added to the flavor of what I was preparing so I didn't really mind too much.


I wanted to use some pork tenderloin that was leftover from another day so I decided to make some pressed Cuban sandwiches. The pork was just pan roasted in a little butter and olive oil with salt and pepper. Typically though, the pork in a Cuban sandwich has been marinated in a garlicky mojo before roasting. So in order to impart some of that flavor into my already cooked pork, I decided to make what I will call a "mojo butter" and I slathered it on the inside of the sandwich before grilling. I thought the results were great...here's the recipe:


Cuban Pressed Sandwiches with Mojo Butter


Butter:
2 tablespoons Kerrygold butter, room temperature
1 clove garlic, mashed
1 teaspoon orange zest, finely chopped
1 teaspoon lime zest, finely chopped
pinch of oregano
pinch of salt
pinch of pepper

Sandwiches:
2 Cuban style rolls or Hoagie style rolls, split
4 slices Swiss cheese
4 slices baked ham, thinly sliced
4 slices pork tenderloin, thinly sliced lengthwise
4 sandwich sliced dill pickles
2 tablespoons canola oil


To make the mojo butter, in a small bowl stir together the butter, garlic, orange and lime zest, oregano, salt and pepper.


Slather the mojo butter on the cut sides of the rolls. Layer the bottom half of each roll with 2 slices of Swiss cheese, 2 slices baked ham, 2 pickle slices and 2 slices of pork tenderloin. Top with the remaining roll halves.


Heat the canola oil in a large non-stick skillet over medium high heat. Place the sandwiches in the skillet and immediately press down with either a sandwich press, foil wrapped brick or a cast iron pan. Cook 6-8 minutes on each side or until golden brown and the cheese is melted.


I heart butter!

Wednesday, April 23, 2008

Yummy Yummy Chinese Food

I have always wondered how Chinese restaurants come up with their names. Some seem to just use the "Chinese-iest" name they can think of, you know to lure you in with authenticity: like Chang Jiang or Ming Bao. Others just seem to use Chinese things like Jade or Green Tea or The Great Wall. But by far the best Chinese restaurant name I've ever seen has to be "Yummy Yummy Chinese Restaurant".

Go ahead, Google it.
You won't believe how many restaurants come up that have that name. I have to ask my brother who speaks Chinese if that is code for something in Chinese or if it's just the restaurant owner's way to convince you that yes, the food is in fact yummy, yummy. I think I would equate it to a laugh track on a TV sitcom...am I so stupid I don't know when to laugh or is the show so not funny, but they're trying to convince me that all these other people are laughing so I should be too.


Well they can call it Yummy, Yummy, Delicious, Delicious or anything they want and I will still probably never be a big fan of Chinese food. That being said though, my husband is a big fan. He is always trying to convince me to cook Chinese food. So every once in awhile I crack out the bottle of "Yummy, Yummy" soy sauce and see what I can come up with.


At Target Greatland the other day I found this really cute packaged Chinese food that is put out by Chef Ming Tsai under his Blue Ginger line. I'll be honest, it was the cute boxes that caught my eye. I bought the Sesame Almond Noodles. They are shelf stable, microwavable Asian entrees and appetizers that have been around for a couple of years, but I seemed to have just noticed them.


The noodles could not have been easier, just pop in the microwave for a minute or so and you are set. I made an Asian Mango Chicken "Stir Fry" to go with it (I had a bit of leftover chicken from my French Chef Chicken and Potatoes). My husband thought that both the noodles and the chicken were indeed Yummy, Yummy.


Asian Mango Chicken “Stir-Fry”

1 Tablespoon Canola Oil
1 shallot, minced
1 jalapeno pepper, seeds removed, minced
1 cup diced mango
1 cup diced cooked chicken
1/4 cup red pepper seasoned rice wine vinegar
2 tablespoons brown sugar
1 tablespoon soy sauce
2 tablespoons lime juice
2 tablespoons coarsely chopped fresh cilantro
2 tablespoons coarsely chopped fresh basil
Pinch red pepper flakes
Salt to taste

Heat the oil in a medium sized skillet over medium high heat. Add the shallot and jalapeno and cook, stirring, until tender.

Stir in the mango, chicken, rice wine vinegar, brown sugar, soy sauce and lime juice; cook until almost all of the liquid is absorbed. Stir in the cilantro, basil, red pepper flakes. Add salt or additional soy sauce to taste.


Yield: 2 servings

Tuesday, April 22, 2008

Chicken and Potatoes French Chef Style

When I was a Girl Scout in the fourth grade, I was invited to my friend Anne Marie's house to work on my cooking badge. With the help of the other girls in my troop, we made an entire meal from start to finish: roasted chicken, green beans and baked potatoes. We then sat down as a troop (there were 6 of us) along with Anne Marie's big family (there were 8 of them) at their huge dining room table to eat the dinner that we had prepared.
(Junior Girl Scout)

As a kid, I usually approached my eating in an airline-food-compartmentalized way. Nothing should be touching and I always liked to start with my least favorite food-in this case, green beans- and finish with my favorite-in this case the potato. I loved potatoes-still do-and I couldn't wait to eat the entire potato I had lovingly saved for last. I filled the potato with probably more butter than I should have and began eating. I will never forget the family's looks of horror when I finished the white of the potato and then casually moved on to devour the skin. Was eating the skin wrong? I had always eaten the skin. The skin had texture, flavor...it was good...I loved the skin! Embarrassed by my seemingly obvious lack of dining class, I pushed the skin aside and waited, red faced, for dessert to be served. I often wonder today, now that it is common knowledge that the skin is the most nutritious part of the potato, if Anne Marie's family ever started eating the skins.


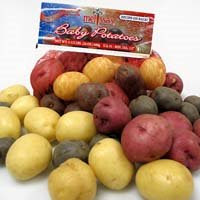
Dinner tonight pays homage to my Girl Scout dinner. At the supermarket I found some fabulous gourmet mixed baby potatoes-purple, white and red by Melissas. They are going to be the base for a roasted chicken and potato recipe that I have been anxious to try.

A couple of weeks ago Martha Stewart had French chef Jean Georges Vongerichten on her TV show and he prepared a Roasted Chicken with Roasted Yukon Gold Potatoes, this is his recipe except instead of the Yukon Gold Potatoes I used the mixed gourmet potatoes-skin and all.

Roasted Chicken over Roasted Tri-Color Potatoes

6 tablespoons unsalted butter
6 tablespoons olive oil
2 lbs. mixed gourmet potatoes, quartered
1/2 teaspoon freshly ground black pepper
1 roasting chicken
1 chicken liver
4 sprigs fresh rosemary
4 sprigs fresh thyme
1 bulb garlic, cut in half crosswise
Fleur de sel, for serving


1. Preheat oven to 450 degrees.
2. Butter a large oven safe skillet or roasting pan with 3 tablespoons butter and 3 tablespoons oil. Place potatoes in a single layer in roasting pan. Season chicken inside and out with salt and pepper. Place liver, rosemary, thyme, and garlic inside cavity of chicken; using kitchen twine, tie legs together to enclose. Rub chicken with remaining 3 tablespoons each of butter and oil. Place chicken on top of potatoes on one of its sides.
3. Transfer roasting pan to oven and roast for 20 minutes. Turn chicken onto its other side and continue roasting 20 minutes more. Turn chicken, breast side up, continue roasting until juices run clear and the internal temperature reaches 165 degrees on an instant-read thermometer, 10 to 20 minutes more.
4. Carve chicken in roasting pan allowing the juices to combine with the potatoes. Serve from the roasting pan, spooning pan juices over potatoes. Sprinkle with fleur de sel.


Check out the before and after photos:


Thursday, April 17, 2008

Thanks a Million


It's hard for me to imagine doing something or making something that someone would pay me a million dollars for. I imagine that is what women such as Ellie Mathews, Anna Ginsberg or most recently Carolyn Gurtz thought too, before Pillsbury gave them each a million dollars for recipes which they created. Now the average gourmand might scoff at the idea of pre-made salsa as the base for a sauce for chicken, waffles used as a stuffing for chicken, or stuffing a pre-made cookie dough with sugar and peanut butter, but the fact of the matter is Pillsbury/General Mills sells a lot of packaged foods every year, so someone, somewhere is buying pre-made salsa, frozen waffles and refrigerated cookie dough(perhaps clandestinely so as not to offend their more sophisticated friends). Quite honestly these recipes, in my opinion, represent several very creative ways in which to use those prepared products.


As someone interested in recipe creation and in recipe contests, I am always fascinated by what wins a particular contest. Now I don't mean that in a negative sense, but specifically I am fascinated by what exactly it was that made the judges select a particular recipe as the winner. Never having been a judge I suppose I will never really know. But what I do know, having participated in several cook-offs (not the Bake-Off yet, that one still eludes me) is that it's usually more than the recipe itself. Often in a cook off situation it comes down also to how well you prepared the recipe on that given day and how well it was presented-the visual impact as well as the taste are just as important as the written recipe itself. Which is why I think it's funny that people made such negative comments (some downright cruel) on the Pillsbury web site about the winning recipes. Perhaps the other people making these recipes lacked the basic skills to prepare the recipe as well as those winners did on the day they were judged at the Bake-Off.


I decided to try the latest million dollar creation and upon hearing the winner zipped off to the supermarket to gather supplies. Not many were needed as it is a simple recipe: peanut butter cookie dough, dry roasted peanuts, sugar and cinnamon. The first cookie I formed without reading through the directions (a problem I have), I made it by placing the filling in between two slightly flattened dough pieces instead of wrapping the dough around the filling. It resulted in a larger, flatter cookie which I thought looked nicer, but you don't get the filling in every bite like with the original method.


The cookies were really very good. I particularly liked the flavor the cinnamon added to the cookie. The creamy center was quite delicious.


The cookies are a simple, tasty and creative twist on peanut butter cookies that has me and I'm sure many other envious bakers scratching their heads and saying "...why didn't I think of that?"


Double-Delight Peanut Butter Cookies


INGREDIENTS:
1/4 cup Fisher® Dry Roasted Peanuts, finely chopped
1/4 cup Domino® or C&H® Granulated Sugar
1/2 teaspoon ground cinnamon
1/2 cup JIF® Creamy Peanut Butter
1/2 cup Domino® or C&H® Confectioners Powdered Sugar
1 roll (16.5 oz) Pillsbury® Create ‘n Bake® refrigerated peanut butter cookies, well chilled
DIRECTIONS:
1. Heat oven to 375°F. In small bowl, mix chopped peanuts, granulated sugar and cinnamon; set aside.
2. In another small bowl, stir peanut butter and powdered sugar until completely blended. Shape mixture into 24 (1-inch) balls.
3. Cut roll of cookie dough into 12 slices. Cut each slice in half crosswise to make 24 pieces; flatten slightly. Shape 1 cookie dough piece around 1 peanut butter ball, covering completely. Repeat with remaining dough and balls.
4. Roll each covered ball in peanut mixture; gently pat mixture completely onto balls. On ungreased large cookie sheets, place balls 2 inches apart. Spray bottom of drinking glass with CRISCO® Original No-Stick Cooking Spray; press into remaining peanut mixture. Flatten each ball to 1/4-inch thickness with bottom of glass. Sprinkle any remaining peanut mixture evenly on tops of cookies; gently press into dough.
5. Bake 7 to 12 minutes or until edges are golden brown. Cool 1 minute; remove from cookie sheets to cooling rack. Store tightly covered.


Monday, April 14, 2008

Pick a Peck of Pickled Fennel


When we first moved into our home about 12 years ago, it had a beautiful vegetable garden in the side yard that was surrounded by the ubiquitous suburban white picket fence. I envisioned baskets brimming with farmer’s market quality vegetables that I would soon be transforming into healthful meals for my family. I saw myself, hoe in hand; laboring on the land creating a colorful garden of culinary delights. That dream lasted exactly one summer. The shade of the towering white oaks circling our yard created a garden filled with mold and rot…well, maybe my lack of garden knowledge and skill had something to do with it. My kind neighbor (no doubt disturbed by their view of our now garden eyesore) reminded me that we live in a town with farm stands aplenty, "...leave the gardening and farming to the experts" she said. So fast forward 10 years, we have about 5 or 6 reliable farm stands (in season of course) and most recently (one month to be exact) one year round Whole Foods Market.

Probably the most exciting fringe benefit of getting a new Whole Foods Market in our town is the fact that the other supermarkets in town have really stepped it up in the produce department. Our town wide selection of organic produce has increased exponentially. A few months ago it seemed that things like jicama and fennel were exotic, once in a blue moon produce department stocked items and now I have my pick of the crop at all the supermarkets in town.

On a recent trip to Whole Foods I picked up a head of fennel. I have decided to try my hand at pickling. I have never pickled anything (except maybe myself on a few occasions). I found a Martha Stewart recipe for pickled fennel and I'm going to give it a go. The Martha Stewart recipe called for 9 bulbs of fennel-I just wanted to taste it, not make a year's supply, so I tried adapting it for 1 bulb. I'll let you know how it turns out in a few days.


Pickled Fennel

1 Fennel bulb
2 tablespoons orange zest
1/2 cup water
3 tablespoons champagne vinegar
1 teaspoon kosher salt
1 teaspoon sugar
1 whole piece star anise

Wash the fennel and cut away any bruises. Trim ends and slice into very thin rings; place the rings in a small bowl or jar and stir in the orange zest.

Bring the water, vinegar, salt, sugar and star anise to a boil in a small saucepan. Pour the hot liquid over the fennel; cover tightly and bring to room temperature.

Store in the refrigerator and serve in a day or two.


Update: the fennel was ok... I served it with grilled fish. I'm not sure I like the whole pickling thing though. I really prefer fennel raw in a salad or maybe sauteed with pasta and chicken.

Sunday, April 13, 2008

Cattle Coercion-The Farmer's Cow Milk

So just who was the first person to decide we should be drinking cow’s milk? My family and I have often joked about it-picturing the farmer with his bucket of milk fresh from the cow and deciding that it looked good enough to drink. When I think about all the dairy foods I love, like cheese, ice cream, butter and your typical cold glass of milk I easily dismiss who was first to drink it and am just grateful.


My recent find at the grocery store actually seemed to find me. It was right there in the dairy case staring at me with its bovine eyes: The Farmers Cow milk.


I remember first noticing the cartons- they were colorful with a somewhat intimidating cow staring at you from the center of the carton; I felt the cow eyes watching me as my recently manicured fingers fondled my usual Stop and Shop gallon. The eyes seemed to be following me, perhaps beckoning me to notice them, I’m pretty sure I may have even heard a moo or two. Finally succumbing to the cattle coercion I grabbed two cartons of fat free and two cartons of 1%.

Once at home, I stacked a plate with Oreos and poured myself a tall one. I could not help but notice that the skim milk’s appearance was not as watery as I was accustomed to. The milk had the creamy silky texture of whole or 2%. Not quite milkshake creamy, but delicious nevertheless. The 1% version was creamier still.

The Farmers Cow milk is a premium milk brand that is marketed and produced by a cooperative of Connecticut family owned dairy farms. It boasts no growth hormones (I like that) and was created in response to consumers like me who are interested in buying local, fresh natural products. It’s currently available only in Connecticut. But perhaps if you ask them nicely your local dairy farmers will do the same.

I decided to test how the milk holds up in one of our family favorites: macaroni and cheese. I used the fat free milk and was really pleased at the consistency (full fat cheeses and quite a bit of butter probably helped with that). For good measure, I served the mac and cheese over spinach-it’s quite a nice combination. Feel free to toss in some sliced fresh garlic with the spinach if you would like, I didn’t have any on hand, but I think it would probably be a good addition.


Three Cheese Penne with Frizzled Shallots and Peppered Spinach

Frizzled Shallots:
Two shallots, peeled, very thinly sliced and separated into rings
2 teaspoons flour
1/4 teaspoon cayenne pepper
1/4 teaspoon kosher salt
2 tablespoons butter
Mac and Cheese:
1 (16-ounce) box Mezze Penne
2 tablespoons butter, plus additional to butter the dish
1/3 cup flour
1 teaspoon kosher salt
2 2/3 cups fat free milk
1 1/2 cup shredded sharp cheddar cheese (I used Cabot Reserve Cheddar)
1/2 cup shredded mild provolone cheese (I used Boar’s Head)
1/4 cup freshly grated good quality parmesan cheese
Peppered Spinach:
1 teaspoon extra virgin olive oil
1 (8-ounce) package fresh baby spinach
1/4 teaspoon red pepper flakes
1/2 teaspoon kosher salt

Butter the bottom and sides of a 2-quart baking dish. Preheat oven to 350 degrees.

To prepare the frizzled shallots, place the shallots in a small bowl and sprinkle with flour, cayenne pepper and kosher salt; toss gently to coat the shallots. Melt the butter in a small sauce pan over medium high heat. When the butter is very hot, but not brown, add the shallots. Cook the shallots, turning frequently until lightly browned. Transfer shallots to a paper towel lined plate to drain; reserve the sauce pan with the drippings.

For the penne, bring a large pot of salted water to a boil and stir in the penne; cook penne for one minute less than the directions on the box indicate. In the same saucepan used to cook the shallots, melt the two tablespoons of butter over medium high heat. Whisk in the flour and salt then cook, stirring, for one minute. Gradually whisk in the milk and cook, stirring, until smooth and thickened. Stir in the cheeses.

Drain the pasta and transfer to the buttered baking dish. Stir in the cheese sauce. Sprinkle with the frizzled shallots and the parmesan cheese and bake in the oven for 15-20 minutes or until lightly browned and bubbly.
While the penne and cheese is baking, heat the extra virgin olive oil in a large skillet over medium heat. Add the spinach a handful at a time and cook, stirring, until wilted. Stir in the red pepper and the salt.

To serve, spoon a portion of the spinach onto each serving plate. Top the spinach with the penne; serve with an icy cold glass of Farmer’s Cow milk. Mmmm!


Thursday, April 10, 2008

All Hail The Jalapeno

(Picture from National Cattleman's Beef Association)

The thing I love about cooking with jalapenos is that they can be very spicy but with a few twists of the knife to remove the seeds and the membranes, they can be mild. When I am at the supermarket, I try to find medium sized jalapenos for this recipe, which happens to be a personal favorite of mine: it combines spicy steak, tropical fruits and a delicious roasted jalapeno vinaigrette. OK, it's also my favorite because I won $10,000 for it at The National Beef Cook Off in 2007. Not bad for a salad. Truth be told, I like it spicy, so I usually leave a lot of seeds in the dressing. But if you prefer mild, just scrape well.


Pepper Steak Salad with Mango, Avocado and Jalapeño Vinaigrette40 to 45 minutes

2 boneless beef top loin (strip) steaks, cut 3/4 inch thick (about 8 ounces each)
2 to 3 jalapeño peppers
1 to 2 teaspoons ground black pepper
8 cups mixed salad greens
1 mango, cut into 1/4-inch slices
1/2 small avocado, cut lengthwise into 8 slices
Salt
1 shallot, very thinly sliced and separated into rings
2 tablespoons shaved firm Cotija or Parmesan cheese

Jalapeno Vinaigrette:
2 tablespoons fresh lime juice
1 tablespoon coarsely chopped fresh cilantro
1 tablespoon water
1/4 teaspoon salt
3 tablespoons extra-virgin olive oil

1. Place jalapeño peppers on grid over medium, ash-covered coals. Grill, uncovered, 11 to 13 minutes or until evenly blistered and blackened. Place in food-safe plastic bag; close bag. Let stand 10 to 15 minutes until skins are loosened.

2. Press black pepper evenly onto beef steaks. Place steaks on grid over medium, ash-covered coals. Grill, uncovered, 10 to 12 minutes for medium rare to medium doneness, turning occasionally. Remove from grill; let stand while preparing vinaigrette.

3. Meanwhile prepare Jalapeno Vinaigrette. Remove and discard skins, seeds and membranes from jalapeño peppers. Place peppers, lime juice, cilantro, water and salt in food processor container. Cover; pulse on and off until combined. With motor running, slowly add oil through opening in cover, processing until well blended.

4. Arrange salad greens on serving platter. Fan the mango and avocado slices over greens. Carve steaks into slices; season with salt, as desired. Arrange over salad. Top with shallot; drizzle with vinaigrette. Sprinkle with cheese.

Makes 4 servings.
Nutrition information per serving: 369 calories; 21 g fat (5 g saturated fat; 12 g monounsaturated fat); 60 mg cholesterol; 272 mg sodium; 19 g carbohydrate; 5.1 g fiber; 30 g protein; 8.4 mg niacin; 0.8 mg vitamin B6; 1.4 mcg vitamin B12; 3.5 mg iron; 29.5 mcg selenium; 5.3 mg zinc.


Cotija is a firm white cheese from Mexico; it is a salty, flavorful cheese that compliments the peppery flavors in the grilled steak. If you are unable to locate Cotija Cheese you may use Parmesan Cheese, which has a similar texture. To shave the cheese, use a vegetable peeler and slice off thin strips of cheese.